Uncategorized

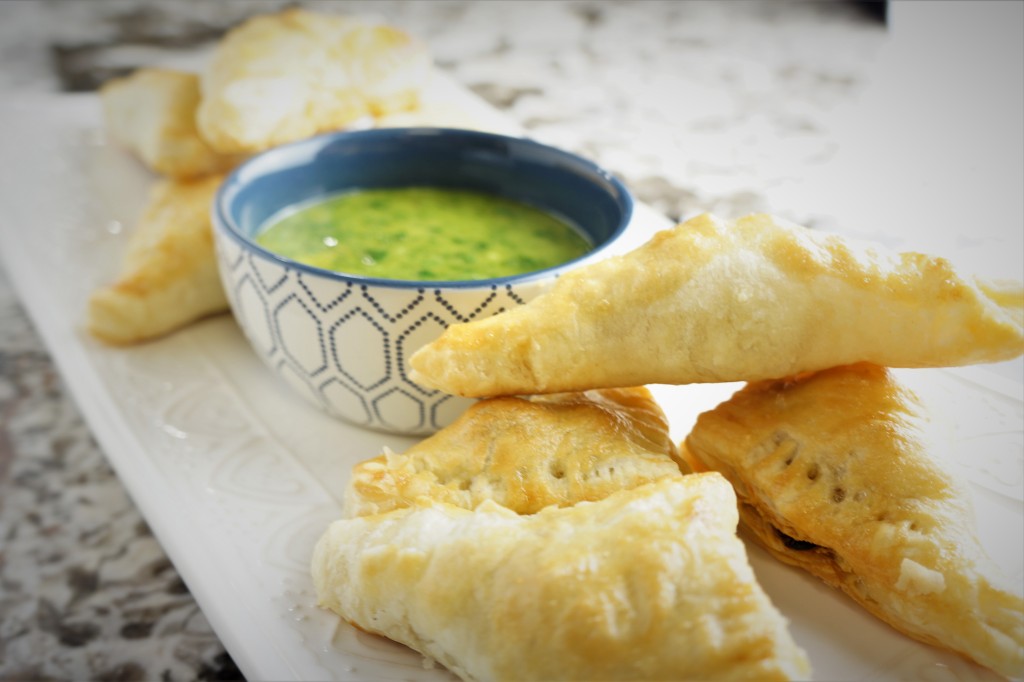
Black Bean and Manchego Cheese Empanadas with Chimichurri Sauce

Looking for a delicious, easy and quick recipe with ingredients that you may actually already have? Look no further, I’ve got you! I love these Black Bean and Manchego Empanadas, that are made with minimal prep time because the 7-ingredient filling is folded into puffed pastry, which only takes a little plan ahead time to defrost. The vibrant chimichurri sauce takes these tasty pockets to the next level, and leftovers top off grilled steak, fish or chicken in your next meal. Truth: my family and I just dip crusty baguette slices into the chimichurri as a snack!. As I said, you may already have the puff pastry in the freezer, a can of beans in the cabinet, and a bunch of herbs ready in the fridge. You could also fill these empanadas ahead of time, and store them in a plastic freezer bag before baking to have a go-to appetizer or snack. The chimichurri can be frozen for up to three months as well! Cook along with me in the YouTube video below, and I’d be so grateful if you subscribe to my Kids Cook Along with Chef Diane channel!

Black Bean and Manchego Cheese Empanadas with Chimichurri Sauce

makes 12 empanadas

  • 1 cup black beans, rinsed and drained
  • 1 green onions, finely sliced (whites and greens)
  • 1 tsp smoked paprika (or regular paprika)
  • 1/2 tsp ground cumin
  • 1 clove garlic, grated
  • 1/2 cup shredded manchego or shredded mozzarella
  • Optional ½ pound ground beef, chorizo or ground turkey, cooked and cooled
  • 1 sheet frozen puff pastry, defrosted but still cold
  • 1 egg, beaten
  • 1 cup parsley leaves
  • 1/2 cup cilantro or mint leaves
  • 1 whole garlic clove 
  • 1 tsp red chili flakes
  • 1/4 cup white vinegar
  • 1/2 cup olive oil
  • salt and pepper

Instructions

Preheat oven to 375 degrees. In a bowl, combine the beans, green onions, paprika, cumin, grated garlic and cheese. Season with a few pinches of salt and pepper. Add the ground meat, if using. Cut the dough into 12 squares. Fill each square with about 2 tablespoons of the bean mixture and fold into a triangle. Use a fork to seal the edges and brush the tops with the egg wash. Place on a baking sheet and bake for 15-20 minutes or until golden.

While the empanadas bake, combine the parsley, mint or cilantro, garlic clove, red chili flakes, vinegar and olive oil in a food processor and pulse until it is a chunky mixture (don’t process until smooth). Season well with salt and pepper. Serve the empanadas warm with the sauce for dipping.
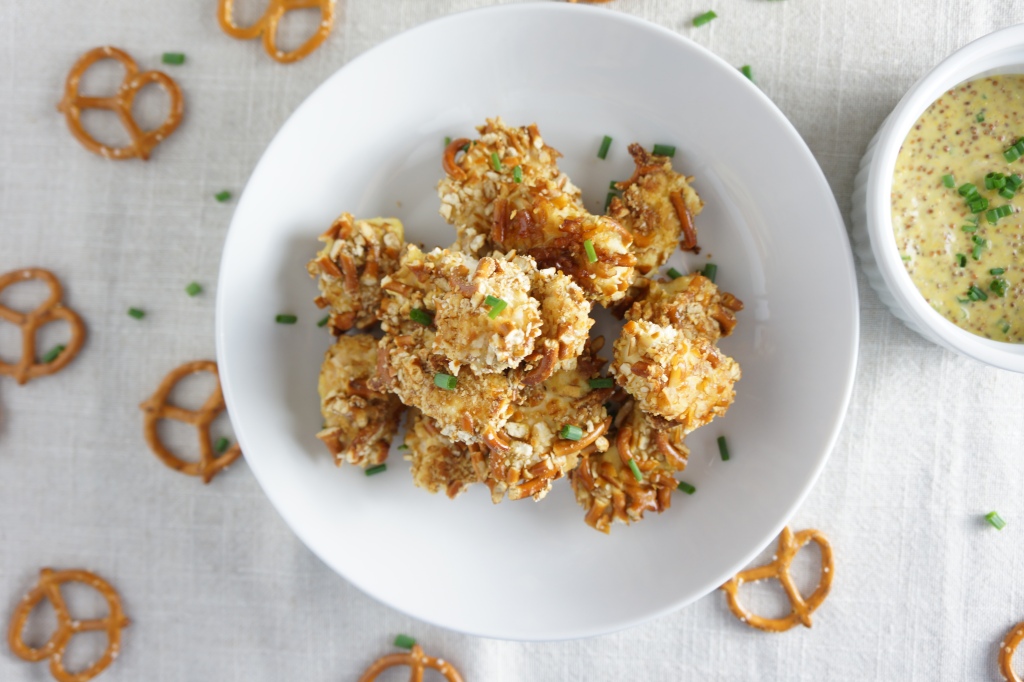
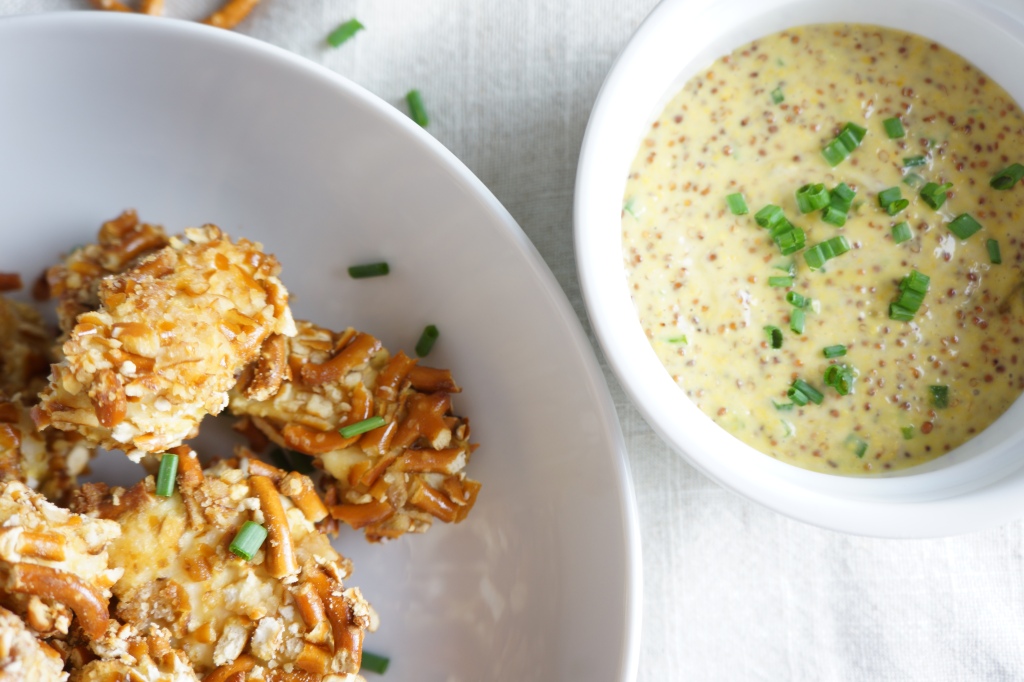
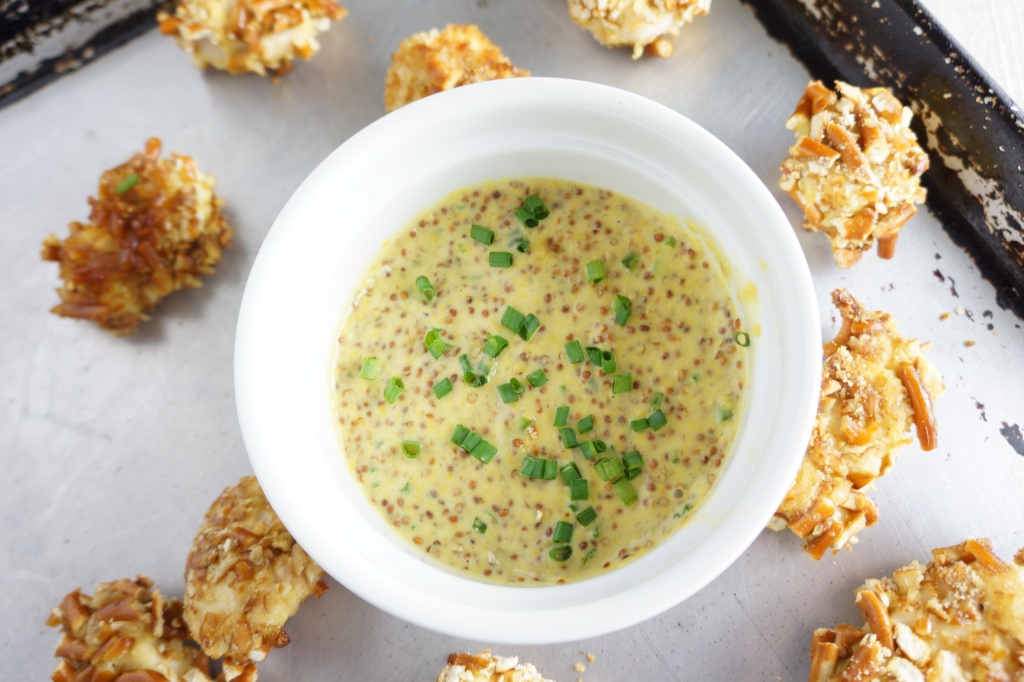
Baked Pretzel Chicken Nuggets with Honey Mustard Dipping Sauce

I’m cooking with kids all summer long, and I can promise you, this recipe brings them all to the kitchen! From cracking and mixing eggs, to bashing a bag of pretzels for the crunchy coating, to snipping chives with scissors, all ages can participate in making this dish. The crispy chicken is perfect with the zesty, sweet honey mustard sauce, and makes a great snack, lunch or appetizer. Be sure to check out my Kids Cook Along with Chef Diane video on YouTube to get all of the steps!

Baked Pretzel Chicken Nuggets with Honey Mustard Dipping Sauce

Serves 4 as a snack or appetizer

Ingredients for the chicken nuggets:

Olive oil cooking spray

2 tablespoons all-purpose flour, or flour alternative (gluten free, almond, coconut, etc.)

1 teaspoon salt

1/4 teaspoon freshly ground black pepper

1 egg

1 teaspoon yellow mustard

1/2 cup crushed plain, salted pretzels

1/2 pound chicken tenders, cut into 1-inch pieces

Ingredients for the dipping sauce:

3 tablespoons yellow, Dijon or grainy mustard

1 tablespoon mayonnaise

1 tablespoon honey

1 teaspoon chives, snipped into small pieces with scissors

1/2 teaspoon Siracha or hot sauce (optional)

Method:

Preheat oven to 450°F. Line a sheet pan with aluminum foil, then spray with nonstick spray.

In a wide shallow bowl, combine flour, salt, and black pepper. In another wide shallow bowl, beat the egg and mustard. In third wide shallow bowl, place crushed pretzels. Dip each chicken tender in flour, shaking off any excess. Next, dip chicken into egg, allowing excess to drip back into bowl. Dip chicken into crushed pretzels, turning until coated and pressing so crumbs adhere. Arrange chicken in single layer on prepared rack. Repeat with remaining ingredients. Spray chicken with nonstick spray. Bake chicken until golden on the outside and cooked through, about 7 minutes. Carefully open the oven, turn chicken over and cook on opposite side for about 7-8 minutes, until nuggets are cooked all of the way through.

Meanwhile, in small bowl, whisk mustard, mayonnaise, honey, chives and Siracha, if desired. Serve chicken with dip.

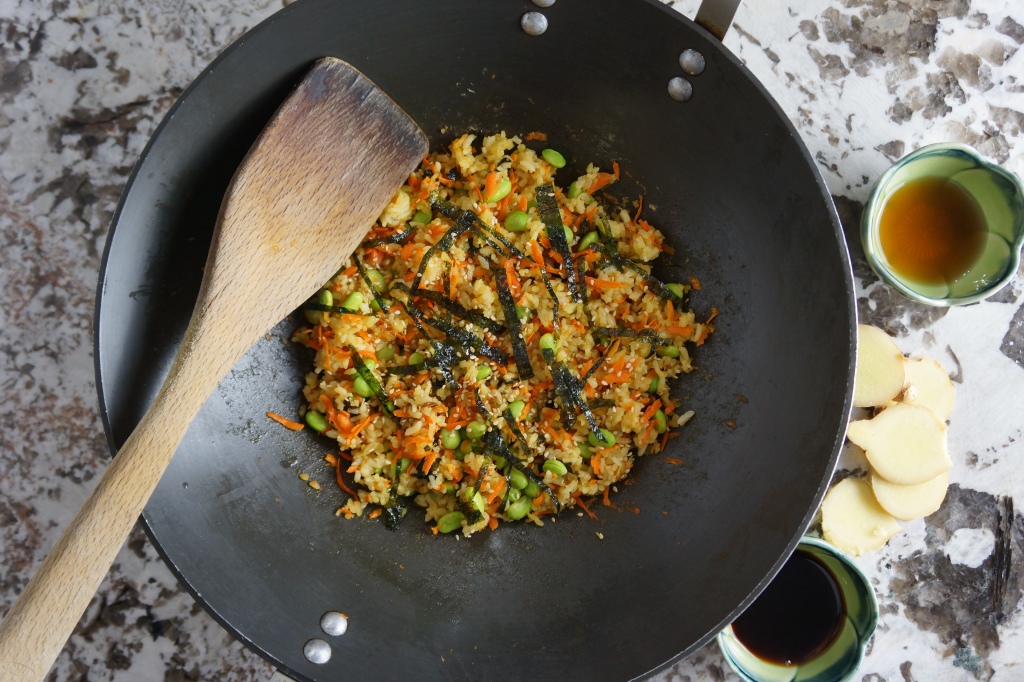
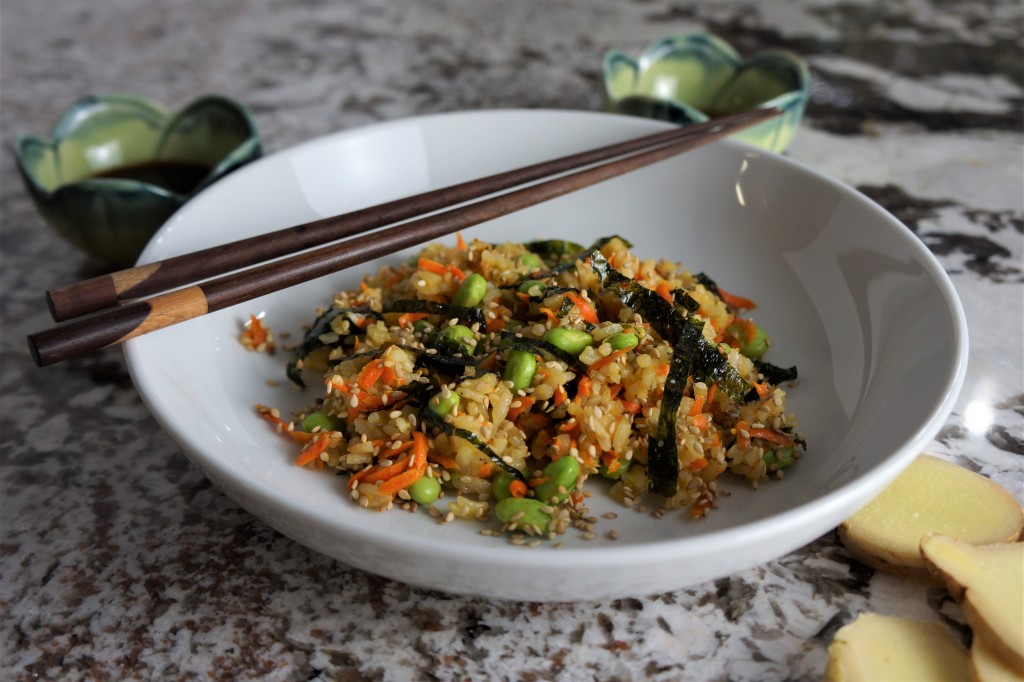
Sticky Fried Rice with Edamame and Seaweed

Every summer, I hold Farm Box Kids Cooking Camp, where we have a few weeks of lessons, from-scratch cooking with summer produce, lots of recipes, walks to the farmer’s market, and tons of creative fun. Last summer, we had to cancel camp, and this summer we didn’t have enough information about Covid 19 to make it a go. But I have still kept in touch with my students by starting a Facebook Live class, Kid’s Cook Along with Chef Diane. Every Wednesday, I cook a delicious, family-friendly recipe that can be made in 30 minutes or less, while kids at home cook along. I adore the photos the proud little chefs take of their creations, and I love the chance to connect with them.

There are so many great things kids learn from cooking! Confidence, independence, creativity and cultural diversity are just a few. If you have kids ages 4 through teen, I’d love to invite you to this private group. If you have children ages 8-teen who want to learn a foundation of skills that will give them a lifetime of cooking chops, check out my Farm Box Kitchen Skills. In this online class, I teach knife skills, working with dry cooking methods, sauce making and baking the perfect dessert. Are you a busy family who would like to have all hands on deck for dinner prep? Both of these programs are made for you.

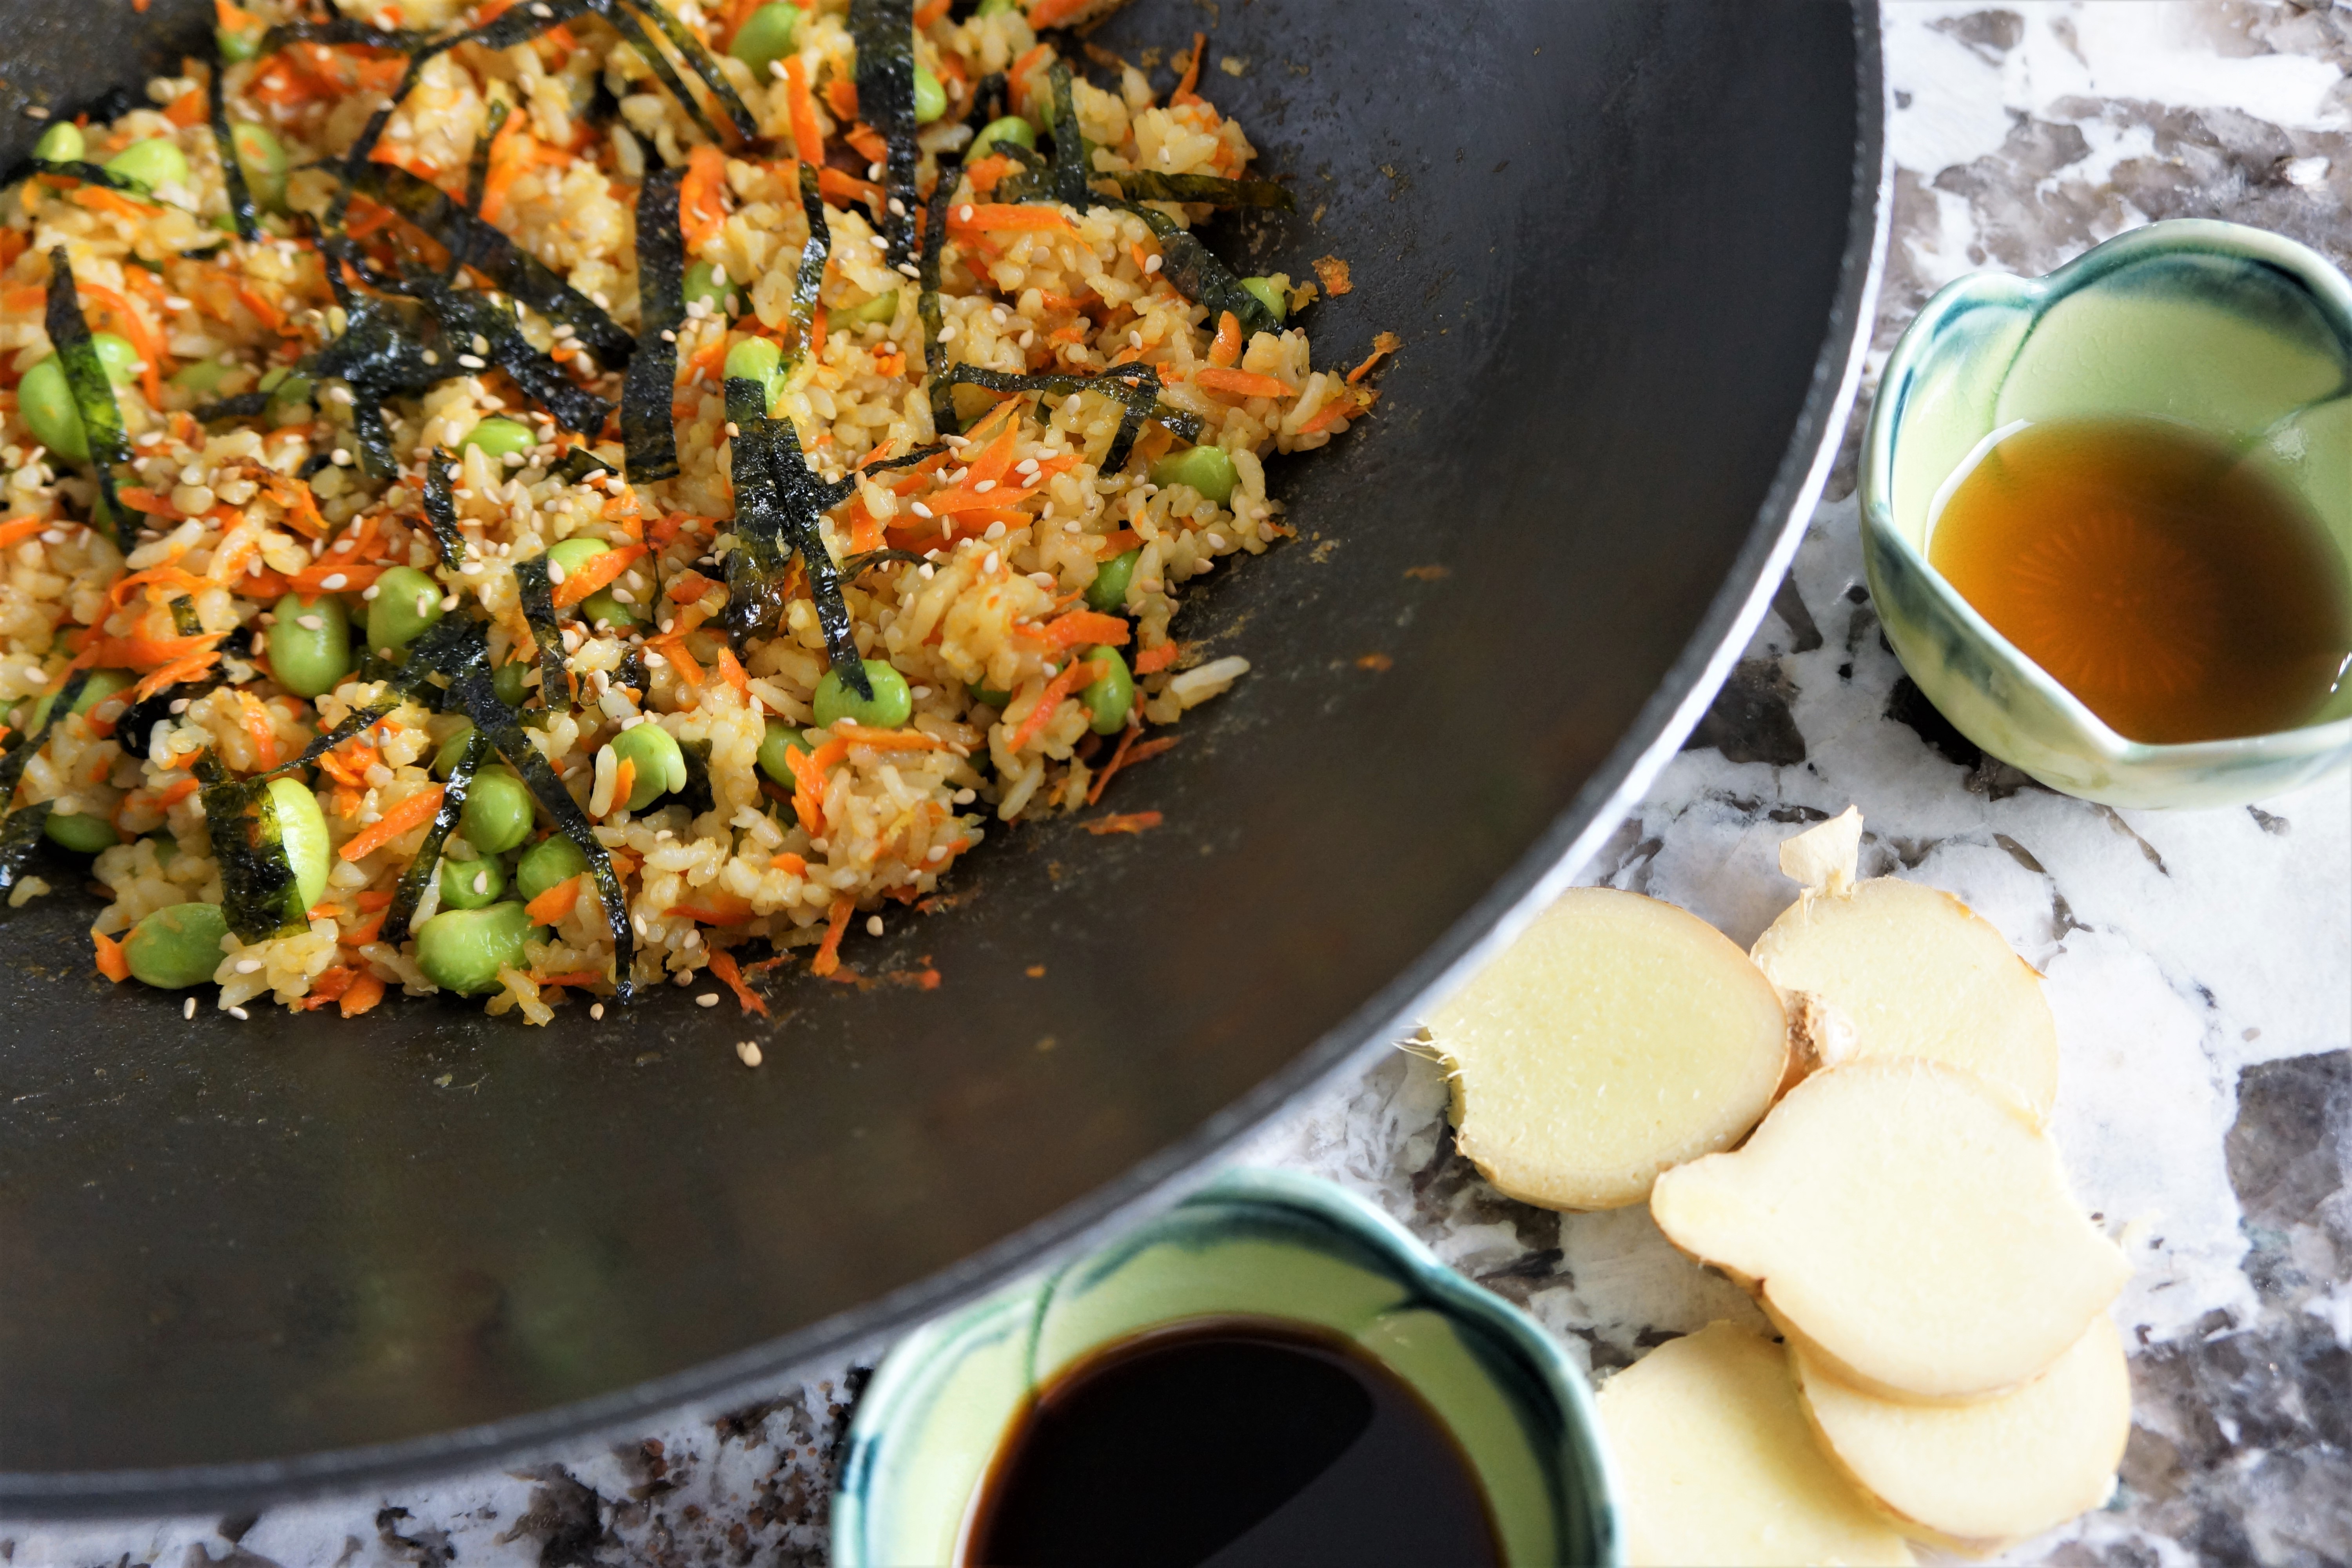
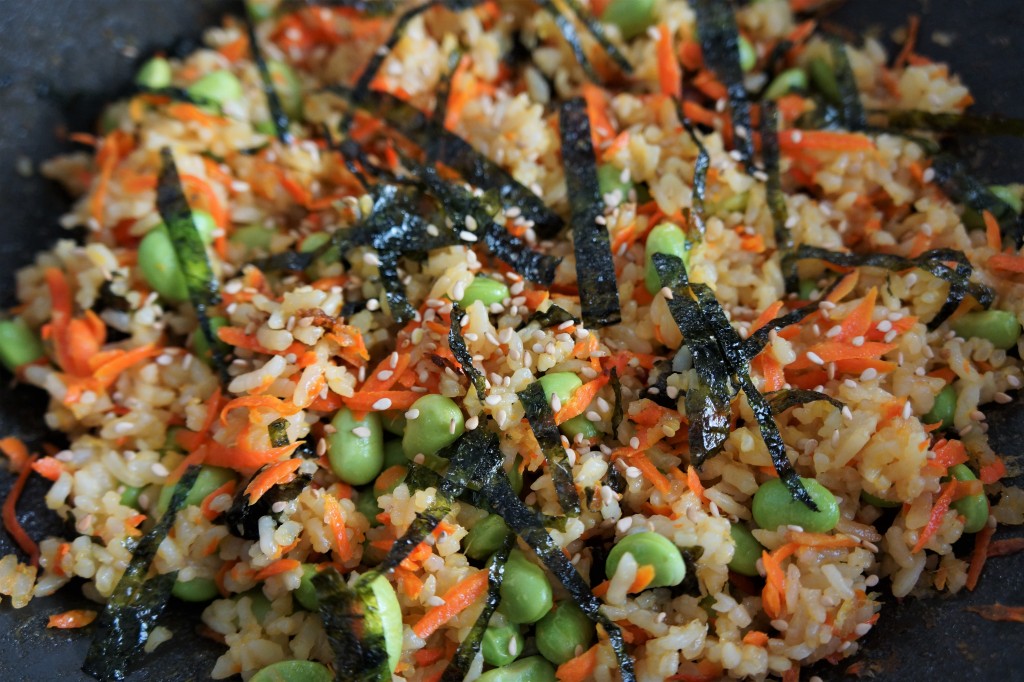
This week, in our Kid’s Cook Along, we made the most simple and delish Sticky Fried Rice with Edamame and Seaweed! It’s so easy to make, you can work along with ages 4-8, or ages 8+ could make it all on their own. The veggies are all grated to make it safe for little hands. If you don’t have a microplane, it’s a must-have kitchen tool! Check out the recipe below or scroll down for the video.

Sticky Fried Rice with Edamame and Seaweed

Serves 4

Ingredients:

2 cups of COOKED short grain rice: You can make it in a rice cooker or purchase it from a Japanese restaurant. The rice should be chilled and is best the next day. See the notes below for Instant Pot sticky rice cooking instructions

1 Tablespoon toasted sesame oil

1 carrot, peeled and grated on the large teeth of a box grater

1-inch piece of fresh ginger, grated

1 garlic clove, grated

2 to 3 Tablespoons soy sauce or tamari

1/2 cup edamame

3 Tablespoons crumbled seaweed snack

Instructions: Heat a large saute pan or wok over medium high heat until you can feel the heat radiating by holding your hand 3 inches above the pan. Add the sesame oil, and put a small bit of the grated carrot into the pan to see if it sizzles. If the oil is sizzling hot, add the carrots and cook, moving constantly in the pan, for one minute. Add the ginger and garlic, and stir for 30 seconds. Add the sticky rice, and continue to stir until the rice is coated with sesame oil and all of the ingredients are combined, for about 2 minutes. Add two tablespoons of soy sauce and stir together for a minute, then taste the rice for seasoning. Add another tablespoon of soy sauce, if desired (but remember the seaweed snack will add more salty taste to the rice.) Stir in the edamame until heated through, then tear up the seaweed snack sheets, stir to incorporate, and serve.

*Sticky Rice Instant Pot Instructions: Rinse two cups of short grain rice in a fine mesh strainer for a minute. Drain and add to the pot. Add two cups of water and 1/4 teaspoon salt, then twist the lid into place. Program to 12 minutes on the rice setting and then allow pressure to manually release, about 10 minutes. Chill the rice overnight to use for the stirfry.

Did you make this recipe? Tag your photo #familyfarmbox

Harissa Roasted Chicken with Garlic Shallot Sauce and Radish Microgreens

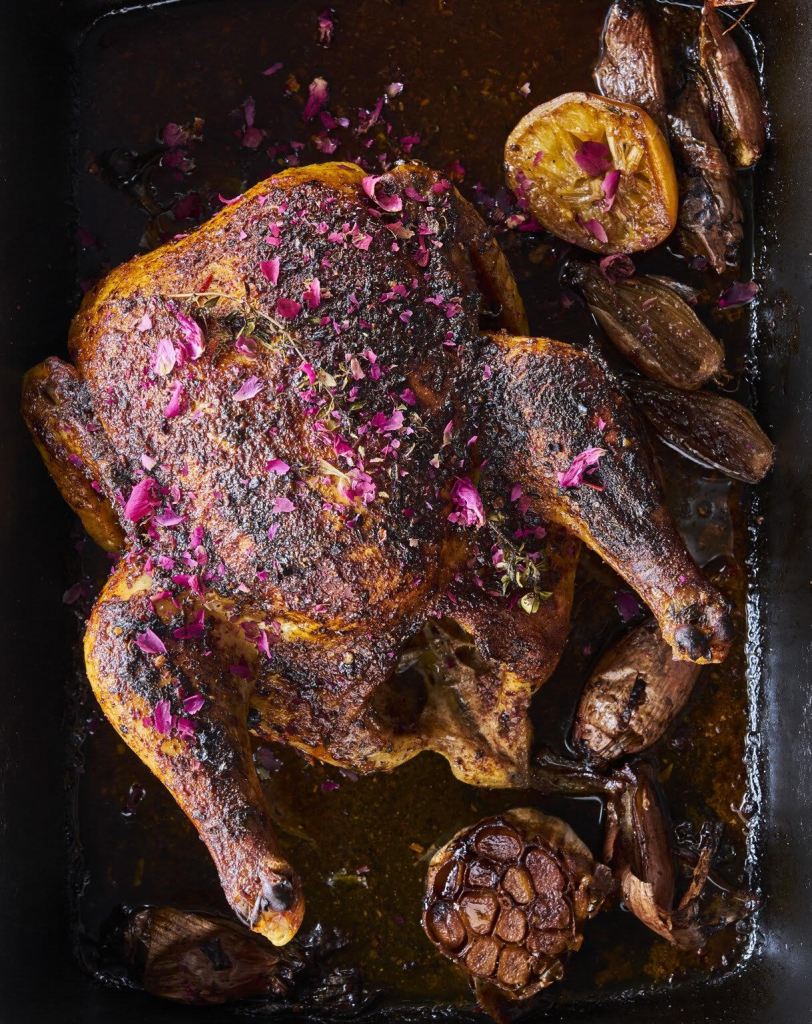
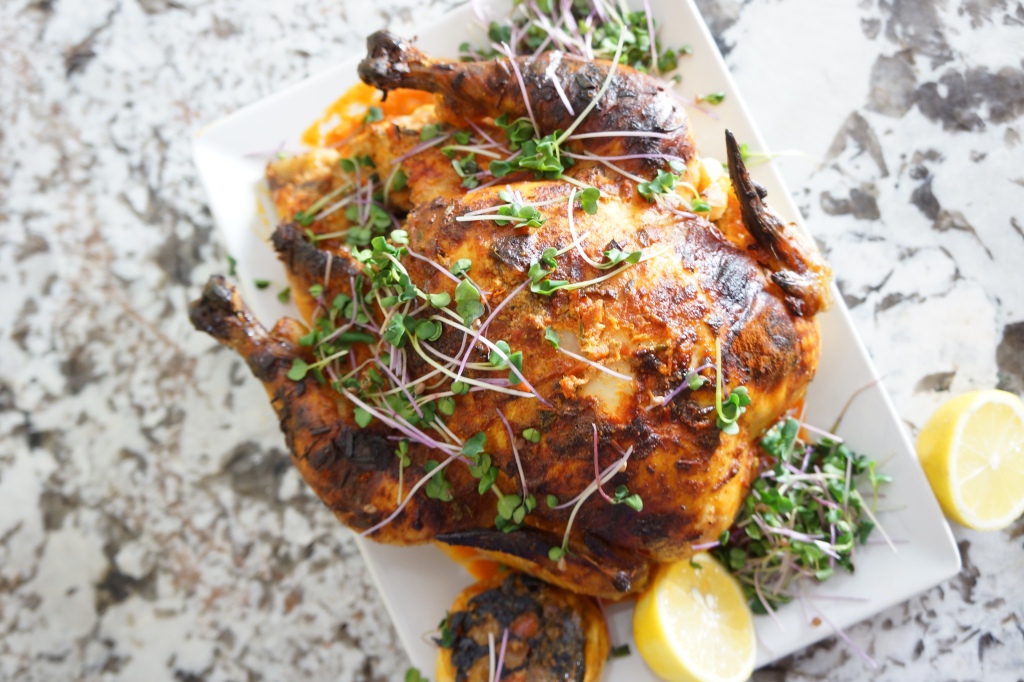
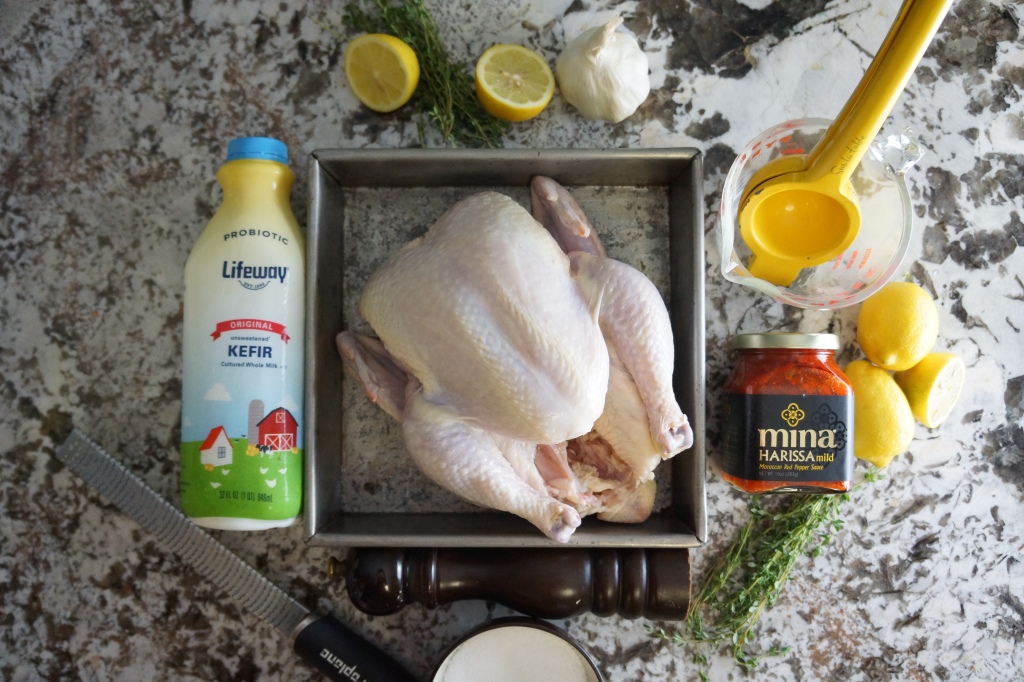
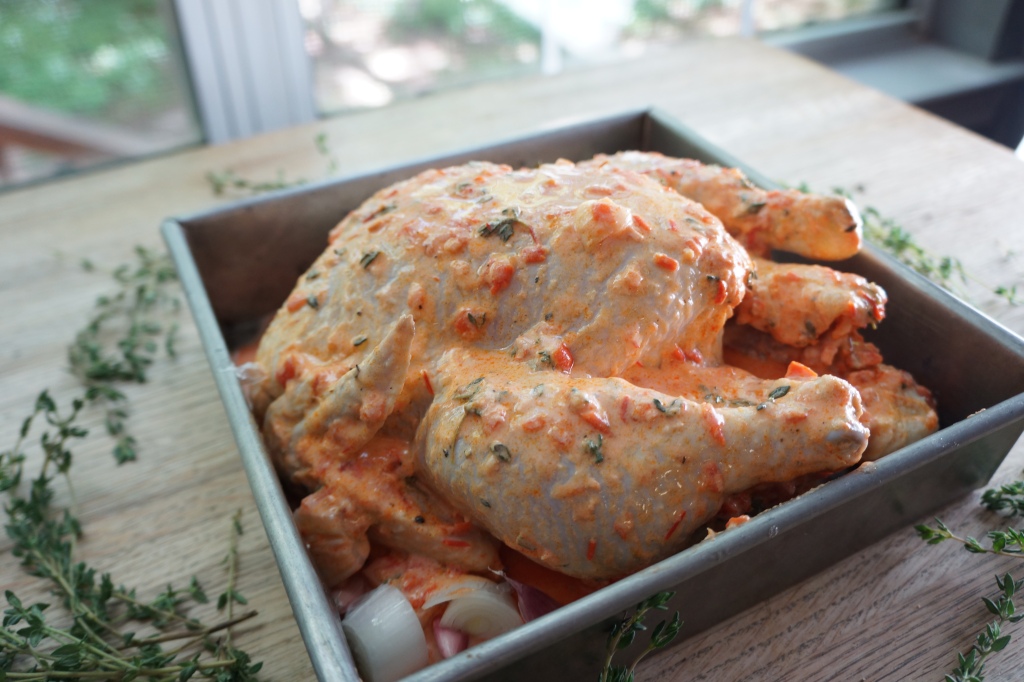
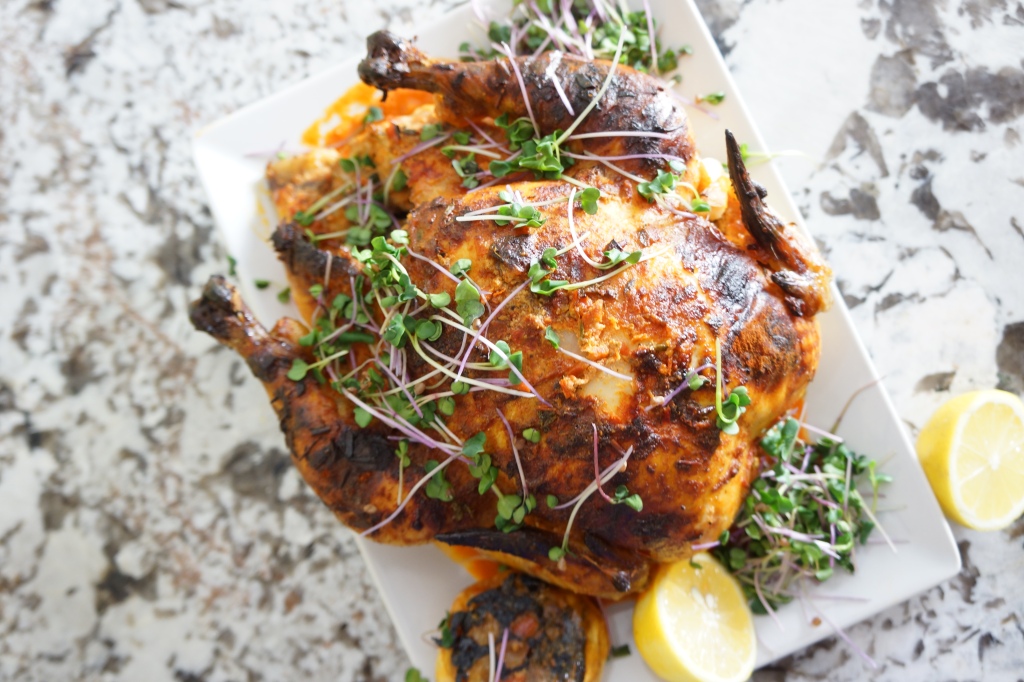
I was excited to tune into Cherry Bombe’s Julia Jubilee, where the country’s top chef, bakers, writers and food stylists celebrated the legend of Julia Child. Food Stylists & Secrets with Susan Spungen, the food stylist who brought on all the food in the movie Julie & Julia, was a conversation and demo with Mariana Velasquez. As Susan talked about her experiences filming the movie and her real life encounters with Julia Child, she whipped up an easy cheese souffle, and this gorgeous Rosy Harissa Chicken. Rosy harissa is a spice created by nyshuk.com and has delicate rose petals blended with sundried chili peppers. In styling the chicken, Susan amped up its beauty with a sprinkle of dried roses. I was inspired by her easy. rustic presentation, and by the simple, yet flavorful, ingredients of the recipe, so I made it! On the left is the Rosy Harissa Chicken, next to my Roasted Harissa Chicken with Garlic Shallot Sauce and Radish Microgreens. I made a few substitutes from her original recipe, using paprika in exchange for the rosy harissa spice blend, radish microgreens instead of rose petals, and employing a mini-prep food processor to put the sauce together. I loved the succulent chicken, soaked overnight in kefir the harissa spiced crispy skin and the silky, pungent sauce. I served this with thyme roasted yellow Finn potatoes and carrots from the farmers market, but it would be equally delicious with Israeli couscous or toasted country bread.

Roasted Harissa Chicken with Garlic Shallot Sauce and Radish Microgreens

Ingredients:

1½ tablespoons plus 1 teaspoon salt
2 teaspoons freshly ground black pepper
One 4- to 5-pound chicken
2/3 cup kefir

1/4 cup fresh lemon juice
4 garlic cloves, grated on a Microplane
1 tablespoon fresh thyme leaves or 1 teaspoon dried thyme
3 tablespoons harissa, plus more to taste
2 large or 4 small shallots, cut in half with skin removed (about 4 ounces)
1 head garlic
1/2 lemon to roast, 1/2 lemon to serve
3 to 4 sprigs fresh thyme
1½ tablespoons NY Shuk brand Rosey Harissa or paprika
Radish microgreens

Method:

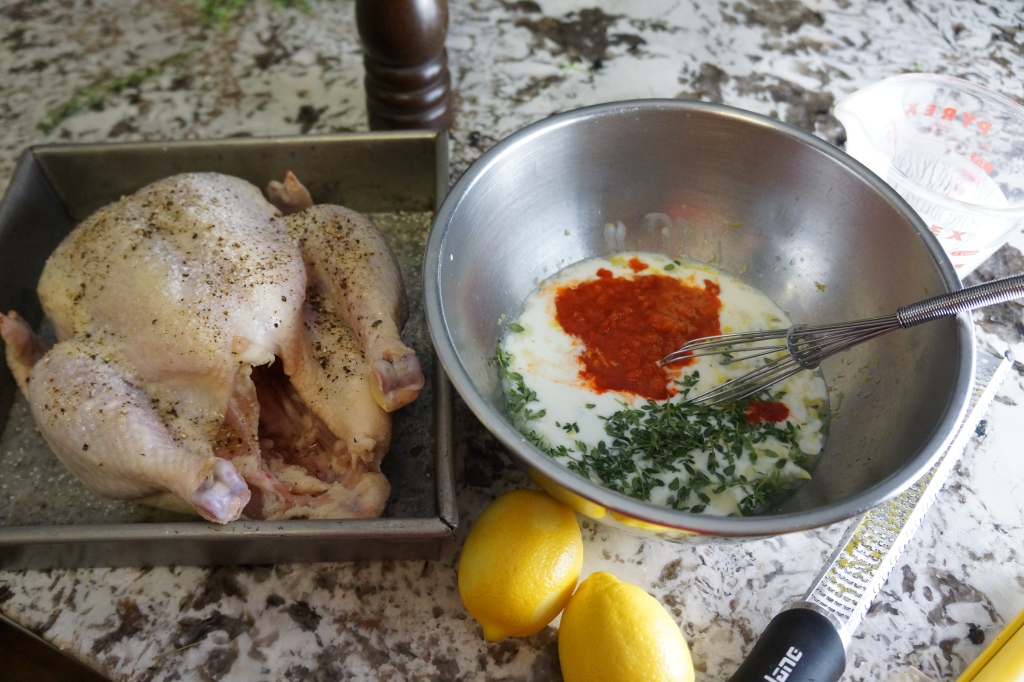
Combine 1½ tablespoons of the salt and the black pepper in a small bowl. Place the chicken in a wide, shallow work bowl and season it inside and out with the mixture.

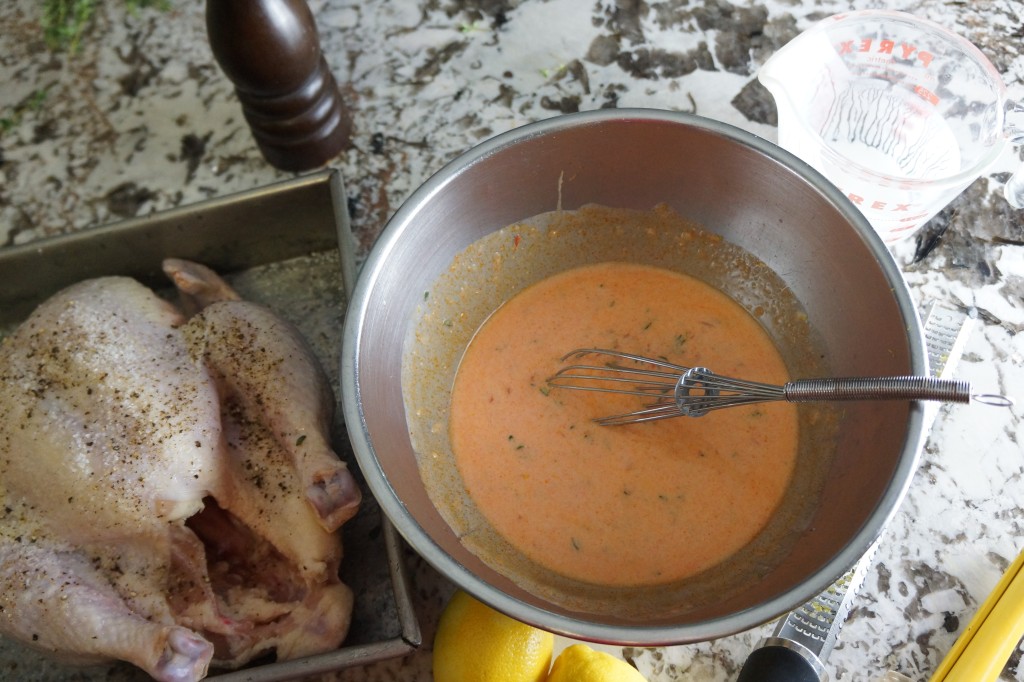
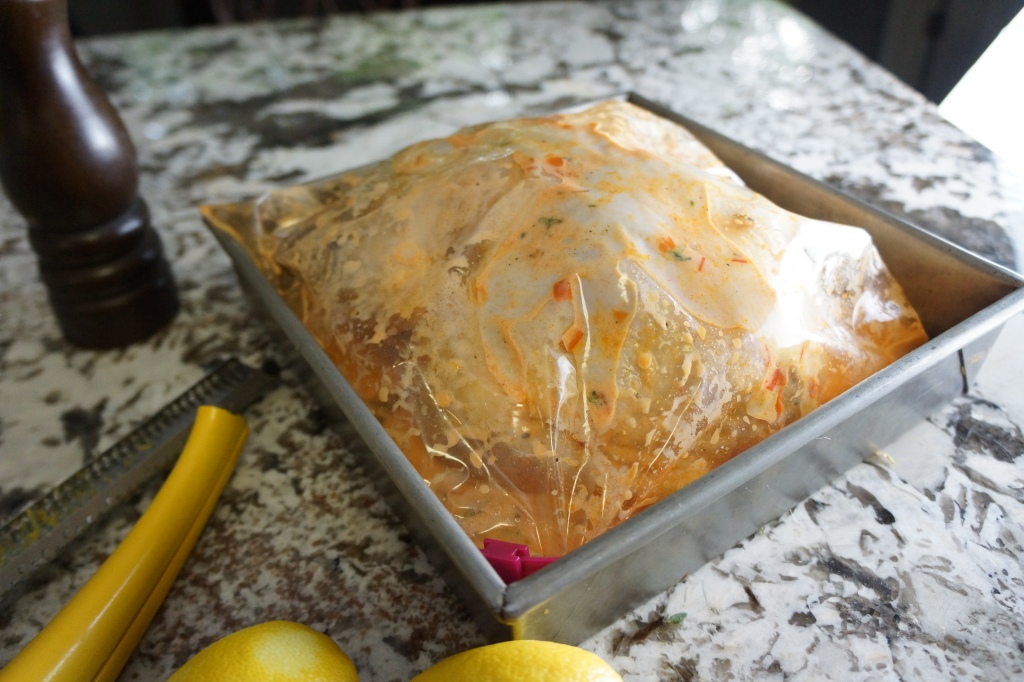
In a separate bowl, combine the kefir, lemon juice, grated garlic, the remaining 1 teaspoon salt, the thyme leaves, and plain harissa. Place the chicken in a 1-gallon resealable plastic bag. Pour the mixture over the chicken and use a rubber spatula to help coat the chicken all over, inside and out, with the mixture. Squeeze as much of the air out of the bag as possible. Refrigerate for at least 8 hours and up to 24 hours, turning occasionally.

Preheat the oven to 400°F. 

Scatter the shallots in a small roasting pan or other heavy 9 by 13-inch pan. Remove the chicken from the marinade and let the excess coating drip off, leaving a thin coating, and put it in the pan. Cut off the top third of the garlic head. Put the large part facedown in the pan and the small part in the cavity. Put the lemon half cut-side down in the pan. Sprinkle the thyme sprigs on top. Add ¼ cup water to the pan.

Roast the chicken for 45 minutes, then reduce the oven temperature to 350°F. 

Sprinkle the chicken with the Rosey Harissa or paprika and start basting with whatever juices have collected in the pan and in the cavity. Roast, basting every 15 minutes or so and adding ¼ cup water if the pan looks dry, until the leg feels very loose when jiggled, 1 hour and 30 minutes to 1 hour and 45 minutes. The idea is to let it dry a little so the flavors and juices caramelize but do not burn. Always add ¼ cup water before it starts to burn.

Transfer the chicken to a carving board to rest. Squeeze the lemon and garlic into the pan juices. Place the pan juices, garlic and shallots into the cup of a food processor or blender. Process until smooth, and whisk in extra harissa if you want extra heat. 

Pour the sauce on a platter. Carve the chicken and arrange it on the platter to soak up the sauce but maintain the crispy skin. Sprinkle the radish microgreens over the top of the chicken and on the serving platter to wilt. Serve with additional fresh lemon.

Did you make this recipe? Tag your photo #familyfarmbox

Roasted Broccoli with Charred Cherry Tomatoes and Fresh Basil

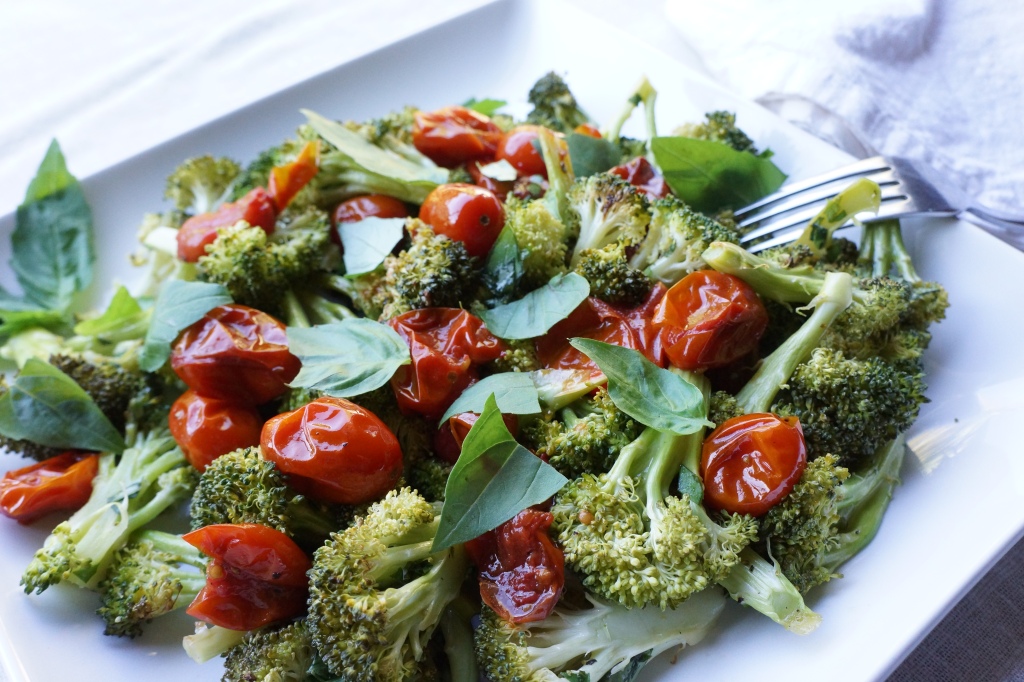
Packing in all of the summer goodness I can with my two favorite veggies that make perfect sense together: broccoli and cherry tomatoes. Throw in a bunch of basil and the tang of a good-quality Balsamic, and you’ve got an easy, and so tasty, summer side dish.

Roasted Broccoli with Charred Cherry Tomatoes and Fresh Basil

Serves 4 as a side dish

Ingredients:

1 head of broccoli, about 1 1/2 pounds, cut from the stem into florets

1 pint of cherry tomatoes, any variety

Olive oil, sea salt and freshly ground pepper

1 tablespoon Balsamic vinegar

8 large fresh basil leaves, torn into pieces

Instructions:

Heat your oven to 375 degrees. Line two baking sheets with parchment paper. Put the broccoli on one of the sheet pans, the cherry tomatoes on the other sheet pan, and then drizzle generously with olive oil, salt and pepper. Distribute the broccoli and cherry tomatoes evenly on the sheet pans. Cook the cherry tomatoes for about 30 minutes, until the tomatoes release their juice, shrink slightly and char on the outside, turning over at about 15 minutes. After 15 minutes, place the broccoli in the oven, turning with a spatula occasionally, for about 15 minutes, until the broccoli is tender and golden brown in places. When both of the vegetables are cooked and browned, remove them from the oven and mix together with the Balsamic vinegar. Transfer the broccoli and tomatoes to a serving platter and top with the freshly torn basil. Serve right away, or this dish can be served on a buffet at room temperature.  

Serve this up with a pasta dish, grilled chicken breasts or roasted salmon filets. You could make it a vegan main by adding pine nuts, white beans or a good quality vegan cheese.

Did you make this recipe? Tag your photo #familyfarmbox

Roasted Fingerling Potatoes with Summer Corn, Smoked Applewood Bacon and Thyme

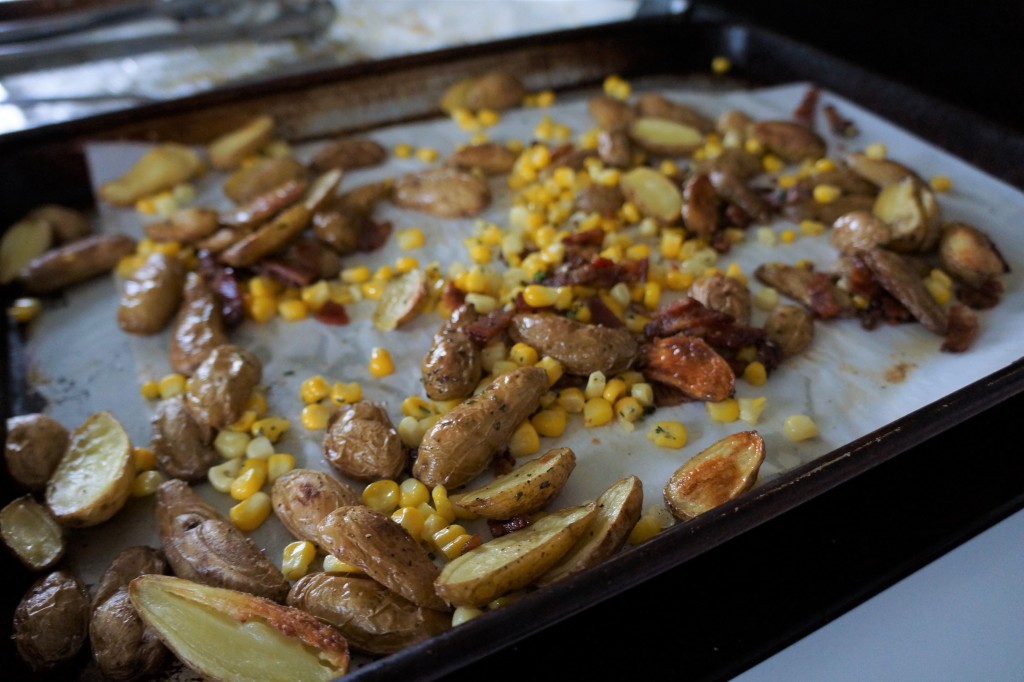
This dish is perfect for my meat and potatoes loving family and supports my mission: veggies first! Simply roasted, tender fingerling potatoes, corn straight off the cob, top-quality smoked bacon and thyme create an end-of summer-almost-fall combo. We love this as a side dish to any grilled meat, foil wrapped fish or shrimp thrown on the grill, or roasted chicken thighs.

Roasted Fingerling Potatoes with Summer Corn, Applewood Smoked Bacon and Thyme

Serves 4 as a side dish

Ingredients:

1 pound fingerling potatoes, cleaned and cut into halves

Olive oil, kosher salt and freshly ground pepper

3 slices of applewood smoked bacon, cut into small pieces

2 ears of fresh corn, cut from the cob

1 tablespoon of fresh thyme leaves, chopped

Instructions:

Heat your oven to 375 degrees and line a sheet pan with parchment paper. Distribute the potatoes on the sheet pan and drizzle with olive oil to coat (about 1 tablespoon), then season with salt and pepper to taste, about 1 teaspoon of salt and 4 cranks of pepper. Using a spatula, turn the potatoes until well coated with olive oil, salt and pepper, and then distribute evenly without crowding. Roast the potatoes for about 10 minutes, then turn with a spatula to brown on both sides. Cook the potatoes until they are golden brown and easily pierced with a fork, about 20 minutes total. Remove the potatoes from the oven.

While the potatoes are roasting, heat a skillet over medium-high heat and add the bacon, distributing evenly around the pan, and cook until the bacon’s fat has rendered and the bacon is golden brown, about 10-12 minutes. Place a sheet of paper towel on a plate and remove the bacon from the pan with a slotted spoon.

When the potatoes and bacon are cooked, mix them together with the corn and thyme on the warm baking sheet. Taste for seasoning, and add more salt and pepper if needed. Serve immediately.  

Did you make this recipe? Tag your photo #familyfarmbox

Parchment Wrapped Sole with Roasted Cherry Tomatoes and Basil Pesto

Summer is here and we are eating up all the sweet cherry tomatoes coming from our backyard and the farm. Amazing fresh, I also love turning them into flavor bombs with a good oven roasting. They serve to add deeper flavor to marinara and romesco sauces, bring a concentrated burst of unami to rice pilaf, or a zing to a classic dish like sole “en papillote.” This sole, cooked in parchment paper, ticks off all the family table boxes: quick, seasonal, fresh, gorgeous and utterly delicious.

Parchment Wrapped Sole with Roasted Cherry Tomatoes and Basil Pesto

Ingredients

            For the tomatoes:

1 pint of cherry tomatoes

Olive oil, sea salt and freshly ground pepper

            For the sole and basil:

1 bunch of basil leaves

1/4 cup of nuts (pine nuts, pistachios, almonds, walnuts all do well here!)

1-2 garlic cloves

2-3 tablespoons of good quality olive oil

1 pound of sole filets

1 lemon

Method

Heat your oven to 350 degrees and place the cherry tomatoes on a baking sheet lined with parchment paper. Drizzle the tomatoes with enough olive oil to coat them, and season them with salt and pepper. Place in the oven and roast for about 30 to 40 minutes, turning with a spatula halfway through, until tomatoes have a slight char and burst. (These can be done a day in advance)

In a small food processor or blender, combine the basil, nuts, garlic and olive oil, and blend until combined but still a little chunky. It should look like a paste, if it’s too dense, add a little more olive oil, and process more. Taste for seasoning and add pepper and salt as needed. 

Line a baking sheet with a sheet of parchment paper twice the width of the pan. Center the parchment on the baking sheet so both sides evenly drape over the sides. Place the sole filets in the center and season with salt and pepper. Evenly distribute the pesto over each filet. Cut half of the lemon into round slices, and then squeeze the remaining half over the sole. Distribute the tomatoes over the sole, add the lemon rounds on top, and pull the sides of the parchment paper together over the sole. Roll the parchment together, tightly to seal, then fold in the sides, again tightly, to seal.

Bake the sole in a 350 degree oven for 20 minutes. Carefully unwrap the parchment paper, there will be a lot of steam that could cause a burn. Check the sole for doneness, it should be opaque in color and firm to the touch. Serve right away.  

Did you make this recipe? Tag your photo #familyfarmbox

Roasted Tomatillo and Avocado Salsa

Here’s another family favorite; a creamy, bright, zesty salsa that pairs perfectly with what’s on the summer grill, or just chips! We like to pile it on tacos or grain bowls, or drape it over grilled zucchini or chicken thighs. I love how the avocado keeps it’s pretty green color when it’s blended with the limey tomatillos. So quick and effortless, you’ll only need a sheet pan and blender, food processor or bullet to bring it all together.

Roasted Tomatillo & Avocado Salsa

Ingredients:

1 pound of tomatillos, papery skins removed, rinsed and cut into quarters

1 large onion, skin removed, cut into quarters

4 cloves of garlic

1 jalapeno, (remove seeds if you’d like the salsa mild)

Avocado oil, salt and ground black pepper

1 ripe avocado

1 bunch of fresh cilantro, stems removed

1 to 2 limes

Heat the oven to 400 degrees. Pile the tomatillos, onions, garlic cloves, and jalapeno on a baking sheet, drizzle generously with avocado oil, salt and freshly ground pepper. Place the baking sheet into the heated oven and roast the vegetables until they are charred and soft, about 20 minutes, turning with a spatula about half way through.

Remove the baking sheet from the oven and cool for a few minutes, the place the roasted vegetables in the bowl of a food processor, blender or bullet. Scoop the avocado from the skin and add it to the vegetable mixture, as well as the cilantro and the juice of one lime. Process the mixture until smooth, then taste for seasoning. Add more lime, salt or pepper if you like. You can serve this salsa right away or store in the fridge for up to 3 days.

Did you make this recipe? Tag your photo #familyfarmbox

Roasted Salmon with Fennel, Lemon & Caper Relish

Salmon is on the weekly rotation at our family table for good reason: it’s a healthy lean protein, packed with omega fatty acids, quick to whip up, and endlessly versatile. We all love it, but have our own favorite way to eat it. My daughter loves it plainly roasted, I like to pile on veggies to give it more flair, and my husband douses it with lots of lemon. A trick that I’ve learned to make everyone happy, but not make separate meals for everyone, is to create a delicious sauce that can be served on the side. My daughter will gobble it up, and sometimes be a little adventurous trying a bit of the topping, while my husband and I can feel like our gourmet sensibilities are satisfied. Here are some of my favorite spring flavors that come together in a quick saute to dress up roasted salmon, or even grilled chicken or pork.

Roasted Salmon with Fennel, Lemon & Caper Relish and Herb Quinoa

Serves 4

Ingredients:

1 fennel bulb, stems and fronds removed (save for stock) and the bulb diced

1 shallot, chopped

1 garlic clove, grated

1/4 cup of white wine

1 tablespoon of capers

zest and juice of one lemon

2 tablespoons of chopped parsley

Olive oil, salt & pepper

4 6-ounce salmon filets (I used wild steelhead salmon)

Method:

Heat the oven to 350 degrees F. Line a baking sheet with parchment paper and place the salmon filets on the paper. Drizzle with olive oil, salt & pepper and set aside.

Heat a skillet over medium-high heat and drizzle with olive oil to coat the bottom of the pan. Add the shallots and fennel, season with a few pinches of salt and pepper, and cook until the vegetables soften and brown slightly, about 3 minutes. Add the garlic and stir for about a minute, making sure the garlic browns but doesn’t burn. Add the wine and stir, then allow the wine to reduce by half, until syrupy. This will take about 3 minutes. Next, add the capers, lemon juice and parsley, giving one final stir. Turn off the heat and taste the relish for seasoning, it should be lemony with a slight licorice taste. Add more lemon, salt and pepper if you need it.

Put the salmon filets in the heated oven and roast for about 10-12 minutes. Remove them from the oven when the salmon is pink and firm. Top the salmon with the fennel mixture, drizzle with a little more olive oil if desired, and serve.

Herb Quinoa

This super-simple side dish is another staple at our family table. Usually I double up on it so I can make quick grain bowls through the week. Two keys to terrific quinoa are thoroughly rinsing the quinoa with cold water in a mesh strainer to rinse off the bitter coating, saponin, that’s on the outside. I think quinoa gets a bad rap because people have cooked it without taking this step! The next must-do is to toast it up in olive oil with either chopped onions (green ones are great too!), shallots or garlic before you put cooking liquid in. Water or stock is your choice, and in this recipe, any herbs you choose are fair game.

Herb Quinoa

Serves 4

Ingredients:

Olive oil

1 chopped shallot (or 3 green onions or a quarter of one onion, chopped)

2 garlic cloves, minced

1 cup rinsed and drained quinoa (the multi-colored quinoa makes a beautiful presentation!)

2 cups water (or stock, whatever you prefer)

salt & pepper

1/2 cup of chopped fresh herbs, such as basil, parsley, cilantro, dill, thyme, chives

Method:

Heat a large skillet over medium-high heat and drizzle with olive oil, enough to coat the bottom of the pan. Add the shallots, garlic and quinoa, stirring frequently to combine and toast, and cook for about 1 minute. Add a generous pinch of salt and stir everything together. Cover the pan with a lid and heat to a boil and then reduce to a simmer, and cook until the liquid is absorbed, about 12-15 minutes. When the quinoa is finished, the the germ ring will show around the outside of the grain.

Let the quinoa rest for about 5 minutes and then fluff with a fork. Fold in the herbs, season with a bit more salt and pepper, then taste for additional seasoning. Serve right away or cool and store in the fridge for 3 days or freezer for 3 months.

Did you make this recipe? Tag your photo #familyfarmbox

Grilled Zucchini with Basil Pesto and Orzo Salad

@dannettemitchellphotography

In my farm box came tender new zucchini and a sweet little box of brightly colored heirloom cherry tomatoes. Discovering a dreamy bundle of basil, I decided to combine two of my favorites: grilled zucchini with basil pesto and and a riff on orzo salad. Mediterranean orzo salad is a staple in my house, we make so many versions of it, sometimes adding roasted peppers, grilled eggplant, lots of lemon and zest, great olive oil, kalamata olives, thyme, pine nuts, Parmesan cheese; whatever is in the fridge that can tie it all together. My lovely spring zucchini with an herby, nutty pesto topped with one of our favorite salads is a perfect vegetarian main or side dish.

Let me know how you enjoyed this recipe, how it turned out for you and any changes you made! Please be sure to find me on Instagram to see more recipes and stories!! Or find me on Facebook Live for Kids Cook Along Classes.

@danettemitchellphotography

Grilled Zucchini with Basil Pesto and Orzo Salad

Ingredients:

1 bunch of basil leaves

1/4 cup of nuts (pine nuts, pistachios, almonds, walnuts all do well here!)

1-2 garlic cloves

2-3 tablespoons of good quality olive oil, plus more for zucchini

4 whole zucchini, stems and bottoms trimmed, cut in half lengthwise

1 pint of cherry tomatoes, cut into halves

1 cup of cooked orzo (just follow package instructions, rinse and drain, then coat with a light drizzle of olive to keep from sticking)

1 lemon, zested, then juiced

1/2 cup crumbled feta cheese

Freshly ground pepper & sea or kosher salt

Method:

In a small food processor or blender, combine the basil, nuts, garlic and olive oil, and blend until combined but still a little chunky. It should look like a paste, if it’s too dense, add a little more olive oil, and process more. Taste for seasoning and add pepper and salt as needed. Remember, we are adding in feta cheese at the finish, so don’t make it too salty.

Heat a grill or grill pan to medium high heat. Drizzle the zucchini with olive oil to coat, and season with pepper and salt. When grill is hot, place the zucchini on with tongs. Grill until grill marks form and zucchini is slightly softened, then flip and grill until marks show on the other side. Remove from grill and arrange on a platter. Drizzle the pesto over the grilled zucchini.

Mix together the orzo, cherry tomatoes, lemon zest and juice, and feta cheese with a drizzle of olive oil. Season to taste with freshly ground pepper and salt, then dish out over the grilled zucchini to serve.

Did you make this recipe? Tag your photo #familyfarmbox
1 2 4