Heirloom Tomato Gazpacho with Pistachio Herb Pesto

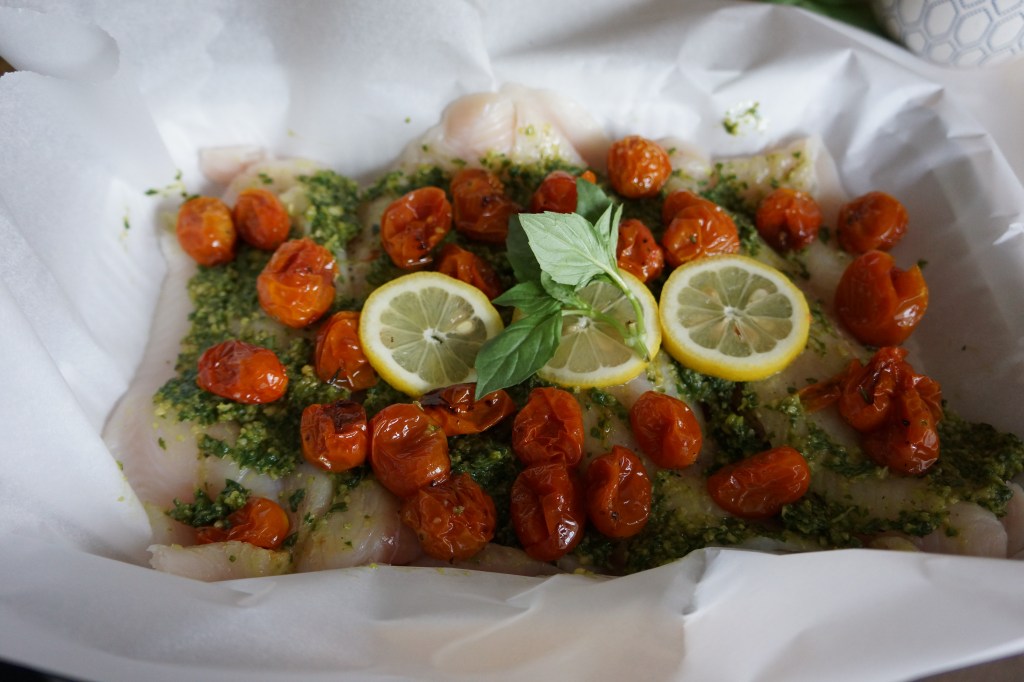
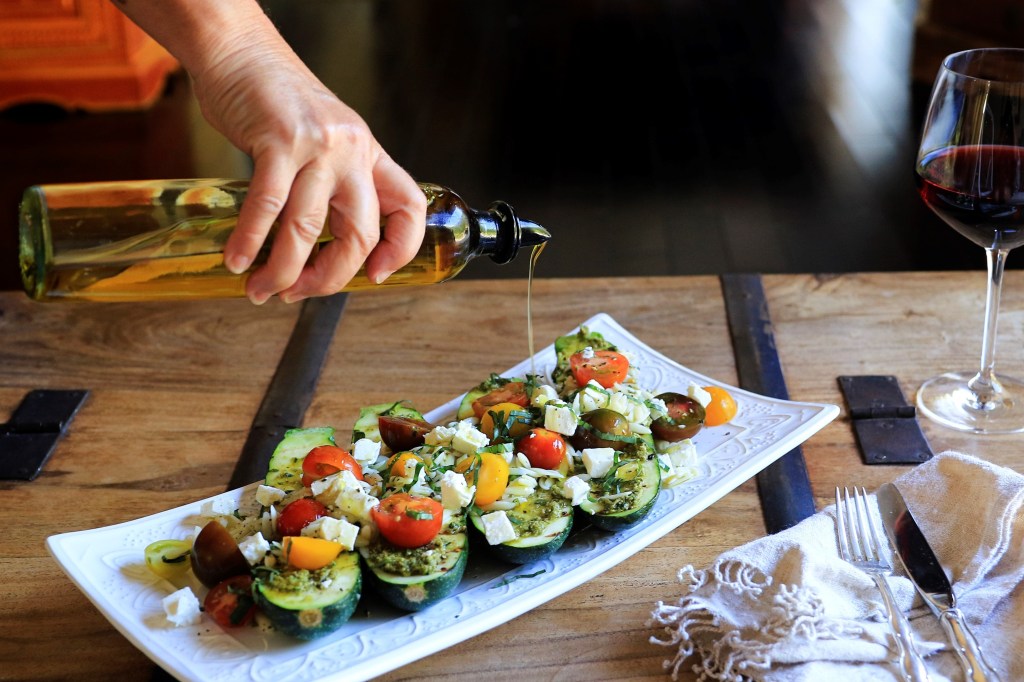
When it’s summertime and you find gorgeous heirloom tomatoes at the farmers market, what do you dream of making? Here’s an effortless, no-cook recipe that uses all of your fresh-from-the-garden produce, perfect for those heat-wave evenings.

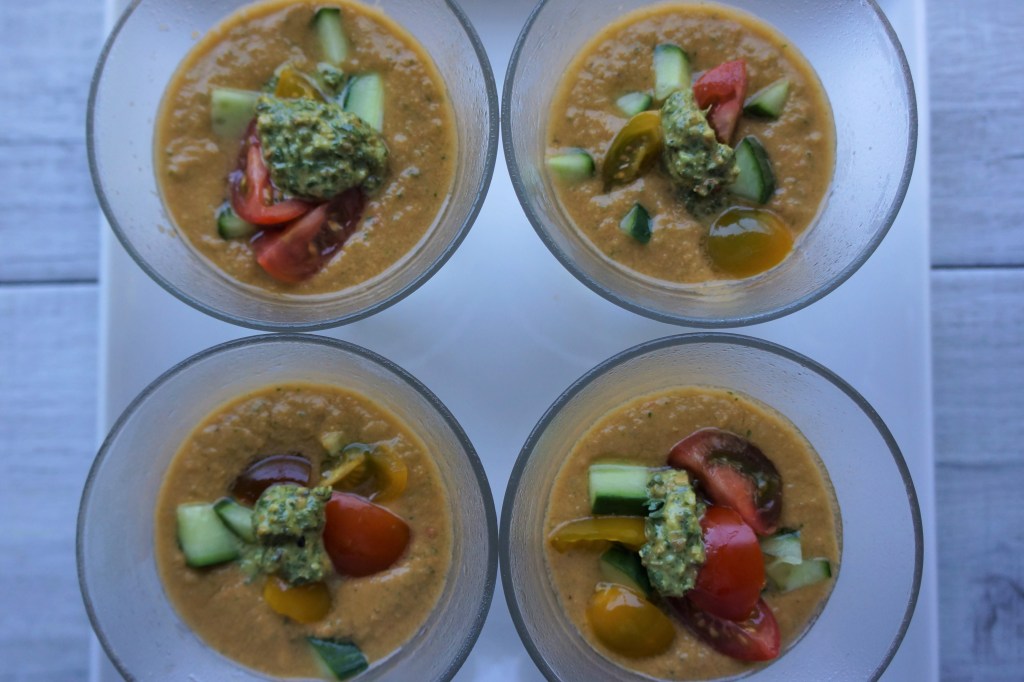
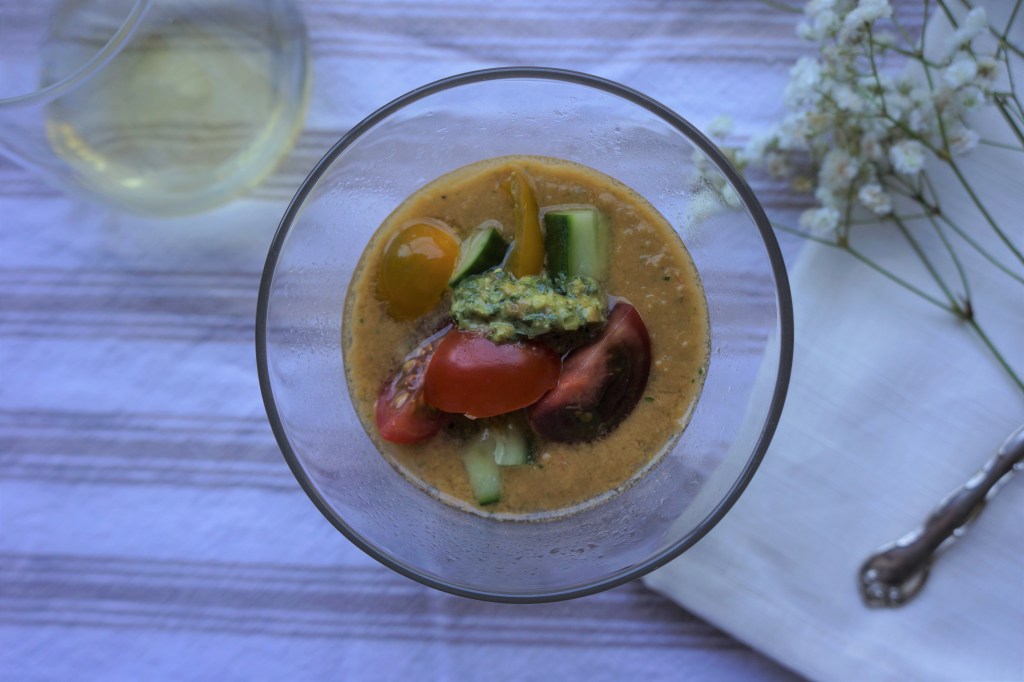
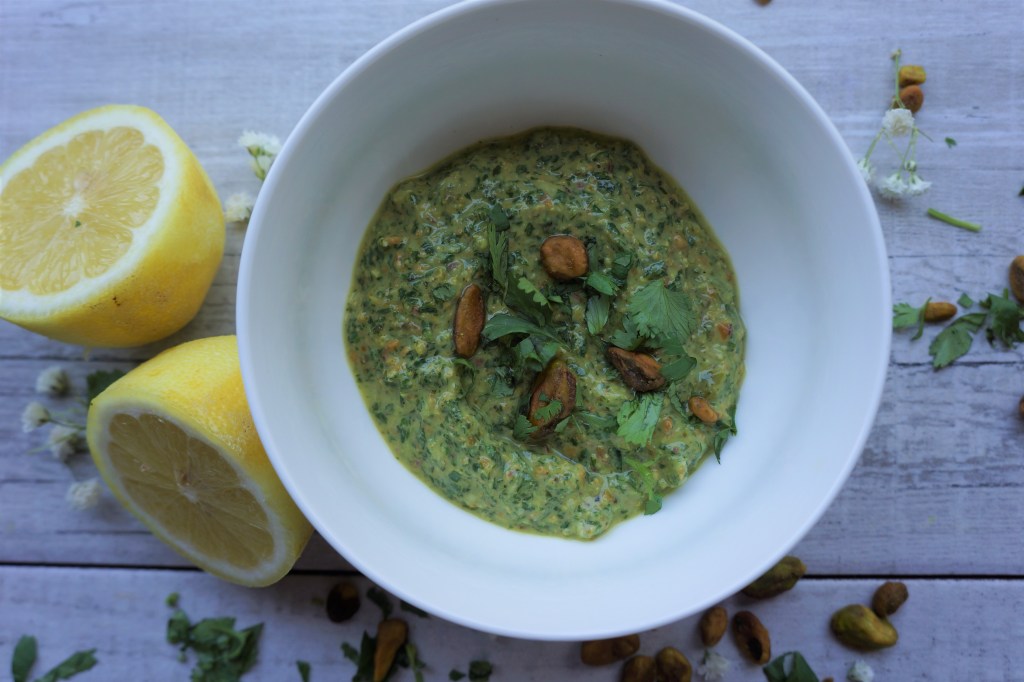
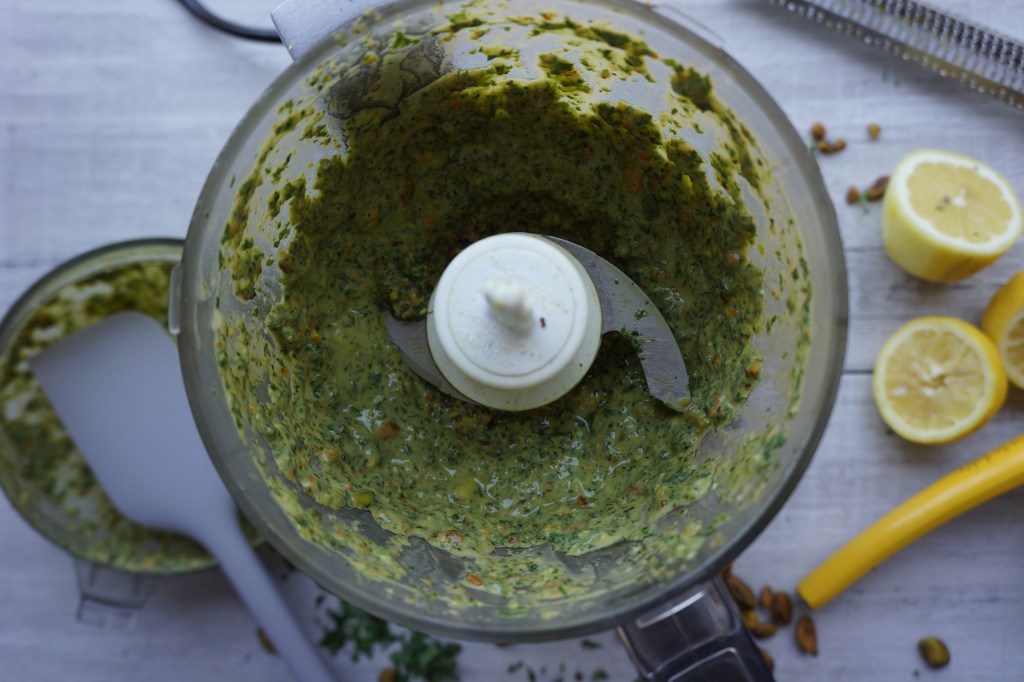
In between not-too-smooth and not-too-chunky, the trick to this gazpacho’s perfect body is the emulsifying combo of oil and vinegar. Serve chilled in icy glasses or bowls and top it off with an herbal, nutty Pistachio Herb Pesto for a vegan meal. Protein lovers could add in poached shrimp to make this summer soup a full meal or serve as an appetizer with grilled bread.

Heirloom Tomato Gazpacho with Pistachio Herb Pesto

Serves 4

Ingredients

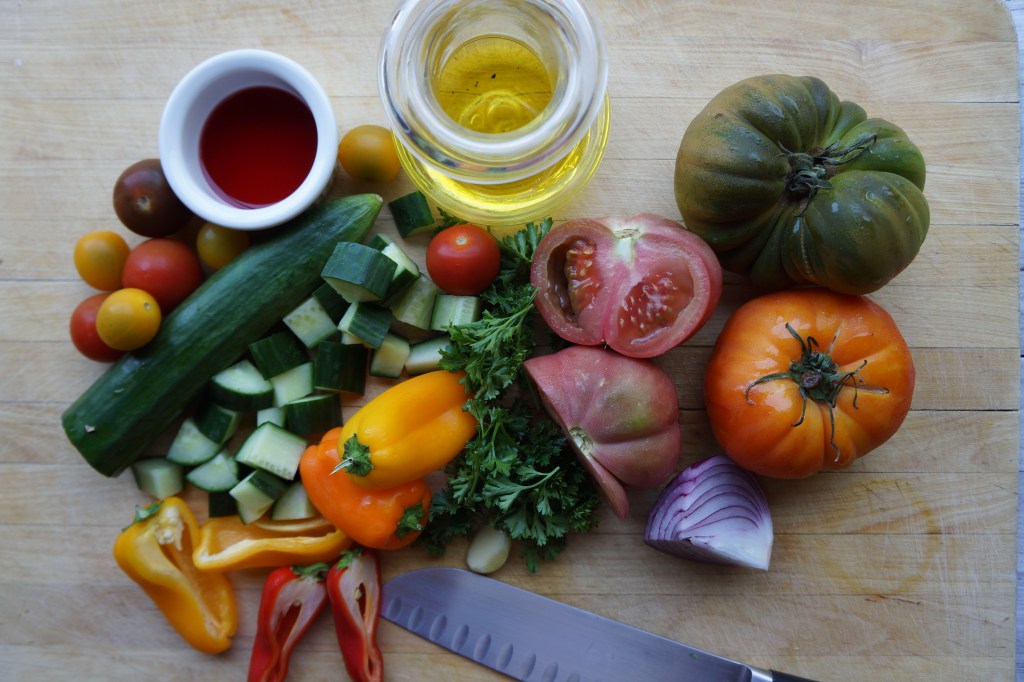
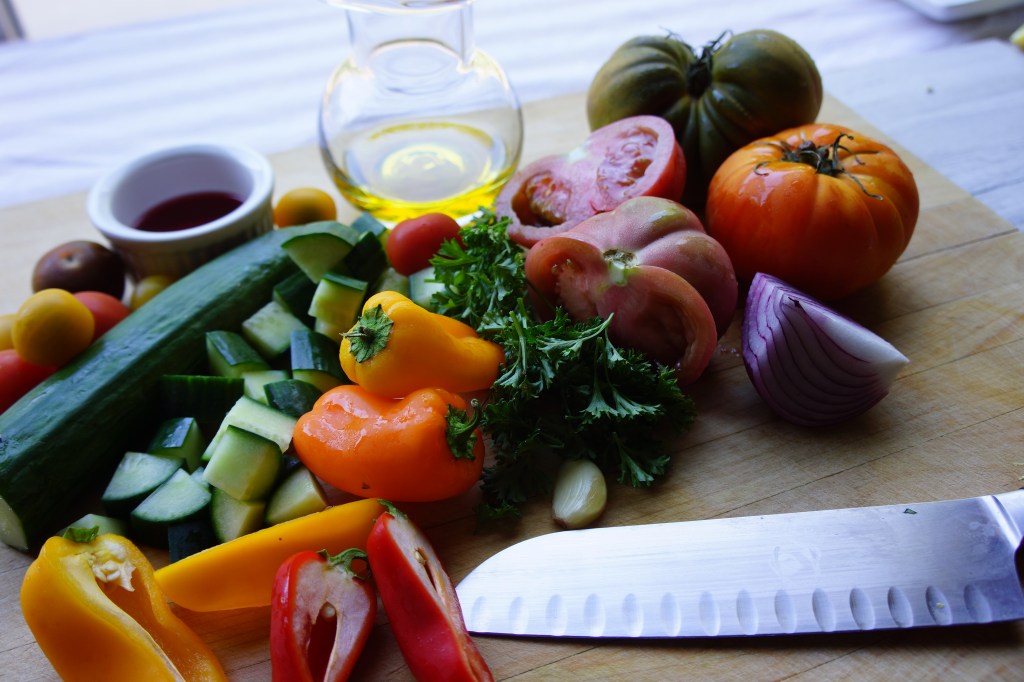
  • 2 pounds of heirloom tomatoes (I used green zebra and brandywine. The color of your gazpacho may change based on what you use), chopped into 2- inch chunks, seeds removed (just brush them out with your fingertip, don’t squeeze out the juice J )
  • 1 sweet bell pepper, or 4 mini sweet bell peppers, stem, seeds and membrane removed, cut into 2-inch chunks
  • 1 English cucumber, cut into 2-inch chunks, 1/4 cup reserved for garnish
  • 1/4 of a red onion, cut into 2-inch chunks
  • 1/4 cup of parsley leaves
  • 1/2 cup of good quality olive oil…I used organic Spanish olive oil
  • 2 tablespoons of Sherry vinegar or red wine vinegar
  • Freshly ground pepper and sea salt
  • About 10 baby heirloom tomatoes, cut into quarters

Instructions

Add the tomatoes, bell peppers, cucumber, red onion and parsley into the bowl of a high-speed blender or a food processor. Securely fasten the lid and blend, starting on low and increasing to high speed, until the mixture is completely smooth, about 2 minutes.

Add the olive oil, vinegar and about 10 cranks of pepper from a grinder and ¼ teaspoon salt. Continue to blend the mixture for about 1 minute, until creamy and emulsified. Taste the gazpacho for seasoning and add more pepper and salt if needed. Put the gazpacho in the refrigerator and chill for at least 2 hours.

When you are ready to serve the gazpacho, divide into chilled glasses or bowls, then top with the reserved cucumber, baby heirloom tomatoes and Pistachio Herb Pesto.

Did you make this recipe? Tag your photo #familyfarmbox

Pistachio Herb Pesto

Perfect on Heirloom Tomato Gazpacho…but don’t stop there. Toss this vibrant, nutty pesto with pasta, or serve as an accompaniment to grilled chicken or salmon.

Pistachio Herb Pesto

Makes about 1 cup of pesto

Ingredients

1 cup of soft fresh herbs such as basil, mint, dill, parsley, cilantro, stems removed

1/2 cup of roasted pistachios—no salt or low salt

1 garlic clove

Zest and juice of one small lemon

1/4 cup of extra virgin olive oil

Sea salt and freshly ground pepper

Instructions

Put the herbs, pistachios and garlic in the bowl of a small food processor with the lemon zest and juice, and blend them together until they are minced. While the processor is running, slowly drizzle in the olive oil and continue to blend until the pesto is smooth. Season with about 1/4 teaspoon of sea salt and a few cranks of pepper, then taste to adjust with additional seasoning if needed.

Did you make this recipe? Tag your photo #familyfarmbox

Stir Fried Turkey and Veggies with Lettuce Wraps and Soy Ginger Sauce

Perfect for a summer dinner, this recipe is on replay at our family table. The vegetables can be customized to what you have in the fridge, fresh from the farmers market or in your CSA box. We make a nutty soy ginger sauce to go along with it, but a drizzle of peanut sauce, a squeeze of lime or a dash of siracha will ramp up the flavors.

Stir Fried Turkey and Veggies with Lettuce Wraps and Soy Ginger Sauce

Ingredients:

For the dipping sauce:

  • 1 tablespoon grated ginger
  • 1 tablespoon rice wine vinegar
  • 1 tablespoon toasted sesame oil
  • 1 tablespoon soy or tamari sauce
  • 1 teaspoon fresh lime juice (about a half of a lime, save the other half to serve on the side)
  • 1 pinch red chile flakes, if desired

                For the stir fried turkey and veggies:

  • 1 tablespoon of avocado oil
  • 1 teaspoon of sesame oil
  • 6 ounces sliced mushrooms
  • 1 bell pepper, diced
  • 2 celery stalks, diced
  • Salt and freshly ground pepper
  • 1 pound of ground turkey
  • 3 green onions, chopped, greens separated from the whites
  • 2 garlic cloves, minced
  • 1 tablespoon grated or minced ginger
  • 1/4 cup chopped cilantro
  • 1 head of iceberg lettuce, core removed, leaves pulled apart to form cups

Method for the Soy Ginger Sauce:

Mix all of the ingredients in a large bowl or Mason jar with a tight fitting lid, and whisk or shake to incorporate. Refrigerate until ready to serve, mixing again before serving.

Method for the Stir Fried Turkey and Veggies:

Heat a large skillet or wok over medium-high heat and add the avocado and sesame oil. Add the mushrooms and brown, stirring only occasionally, until all of the liquids have released, about 5 minutes. Add the red peppers, celery, and cook for another 2 minutes, until vegetables have softened. Add the turkey, breaking up into smaller pieces with a spatula, and seasoning with salt and fresh ground pepper. Stir the turkey as it cooks and browns, continuing to break up into smaller pieces, for about 5-7 minutes. Add the green onion whites (bottoms), garlic and ginger, continuing to stir and cook for another 2 minutes, until the onions, garlic and ginger are very fragrant and the turkey is cooked all of the way through. Taste the turkey mixture for seasoning and add more salt and black pepper if needed. Top the Stir Fried Turkey and Veggies with cilantro and the chopped green tops of the onions.

To serve, top a lettuce cup “wrap” with about 1/2 cup of the stir fried turkey and veggies, drizzle with a little soy ginger sauce, squeeze additional lime on top if desired, and fold to eat like a taco.


Did you make this recipe? Tag your photo #familyfarmbox

Butter Chicken–Dairy Free!

First of all, my family goes nuts for anything with coconut. Since we really try to find ways that skip dairy and butter, most of the meals we plan are dairy-free. But we LOVE butter chicken! Bummer that most recipes call for butter and heavy cream. So I brought in coconut oil and cream to sub for dairy, and the results have been a hit!

We’ve put this dish in the weekly rotation, serving it with sauteed spinach with garlic and lemon.

It’s a very straightforward dish, with just a few ingredients. I use chicken thighs, which melt into tender bites that don’t require cutting, but if you are a fan of chicken breasts, just dice them up and cook for 10 minutes less.

Butter Chicken–Dairy Free!

Ingredients

For the marinade:

  • 1 teaspoon coconut oil
  • 1 tablespoon fresh lemon juice
  • 1 tablespoon grated fresh ginger
  • 2 teaspoons garam masala
  • 2 teaspoons turmeric
  • 1 teaspoon cumin
  • 2 garlic cloves, grated
  • 1/2 teaspoon salt
  • 2 pounds boneless, skinless chicken breasts

For the butter chicken

  • 1 teaspoon coconut oil
  • 1 small onion, diced
  • 1 small jalapeno pepper, stem, membranes and seeds removed, minced
  • 1 garlic clove, diced
  • 1 tablespoon fresh ginger
  • 1 tablespoon garam masala
  • 1 each teaspoon cumin and turmeric
  • 2 tablespoons tomato paste
  • 1 can whole tomatoes with juices (I used San Marzano)
  • 1 can of coconut cream
  • 1 cup of chicken stock
  • Juice of one lemon
  • 1/4 cup of chopped cilantro
  • Salt and freshly ground black pepper

Steamed Rice & Sauteed Spinach for Serving

Method for the marinated chicken:

Whisk the marinade ingredients together in a large bowl and add the chicken. Toss to combine the chicken and marinade, then refrigerate for up to 24 hours.

Method for the butter chicken:

Heat the coconut oil in a large Dutch oven (that has a lid for later) over medium high heat. When oil is hot, sear the chicken in the pan until golden brown, working in batches to not overcrowd the pan, adding additional coconut oil if needed. Remove the chicken from the pan and set aside on a plate or sheet pan.

When all of the chicken is browned and removed from the pan, add the onions and jalapenos, stirring frequently to prevent burning. After 2 minutes, add the garlic, ginger, garam masala, cumin and turmeric, and continue to stir for another minute, or until the onions soften and the mixture is fragrant. Stir in the tomato paste and can of tomatoes, stirring to lift the brown bits from the bottom of the pot, season with a pinch of salt, and continue to cook for another 2 minutes until the tomatoes reduce slightly. Add the coconut cream, stirring thoroughly to combine, and then stir in the chicken stock. Add the chicken thighs back into the pot, stir everything together, bring to a boil and then reduce to a simmer. Cover the Dutch oven with a lid, cracking slightly to vent.

Simmer the butter chicken for 35-40 minutes, until the chicken thighs are fall apart tender. Stir in the lemon juice and half of the cilantro. Serve, topping with additional cilantro, with steamed rice and sautéed spinach.  

Did you make this recipe? Tag your photo #familyfarmbox

Parchment Wrapped Sole with Roasted Cherry Tomatoes and Basil Pesto

Summer is here and we are eating up all the sweet cherry tomatoes coming from our backyard and the farm. Amazing fresh, I also love turning them into flavor bombs with a good oven roasting. They serve to add deeper flavor to marinara and romesco sauces, bring a concentrated burst of unami to rice pilaf, or a zing to a classic dish like sole “en papillote.” This sole, cooked in parchment paper, ticks off all the family table boxes: quick, seasonal, fresh, gorgeous and utterly delicious.

Parchment Wrapped Sole with Roasted Cherry Tomatoes and Basil Pesto

Ingredients

            For the tomatoes:

1 pint of cherry tomatoes

Olive oil, sea salt and freshly ground pepper

            For the sole and basil:

1 bunch of basil leaves

1/4 cup of nuts (pine nuts, pistachios, almonds, walnuts all do well here!)

1-2 garlic cloves

2-3 tablespoons of good quality olive oil

1 pound of sole filets

1 lemon

Method

Heat your oven to 350 degrees and place the cherry tomatoes on a baking sheet lined with parchment paper. Drizzle the tomatoes with enough olive oil to coat them, and season them with salt and pepper. Place in the oven and roast for about 30 to 40 minutes, turning with a spatula halfway through, until tomatoes have a slight char and burst. (These can be done a day in advance)

In a small food processor or blender, combine the basil, nuts, garlic and olive oil, and blend until combined but still a little chunky. It should look like a paste, if it’s too dense, add a little more olive oil, and process more. Taste for seasoning and add pepper and salt as needed. 

Line a baking sheet with a sheet of parchment paper twice the width of the pan. Center the parchment on the baking sheet so both sides evenly drape over the sides. Place the sole filets in the center and season with salt and pepper. Evenly distribute the pesto over each filet. Cut half of the lemon into round slices, and then squeeze the remaining half over the sole. Distribute the tomatoes over the sole, add the lemon rounds on top, and pull the sides of the parchment paper together over the sole. Roll the parchment together, tightly to seal, then fold in the sides, again tightly, to seal.

Bake the sole in a 350 degree oven for 20 minutes. Carefully unwrap the parchment paper, there will be a lot of steam that could cause a burn. Check the sole for doneness, it should be opaque in color and firm to the touch. Serve right away.  

Did you make this recipe? Tag your photo #familyfarmbox

Braised Brisket with Mushrooms

Here in Los Angeles, quarantine 2.0 is in place. Indoor restaurants are closed, along with movie theaters…those places you escape to when it gets too hot to be outside. My favorite markets are still open, although we have masks and lines, social distance dances in the aisles, and bizarre shortages. Looking for something meaty to throw on the grill, I was faced with an empty meat case…the only cut left being brisket. The “new normal” makes everything surprising but strangely accepted, and I dug into cooking for comfort with my brisket and a pile of beautiful mushrooms, while I recalled an article I read where an Italian mother said, “Instead of stocking up on toilet paper, buy food that you’ve always wanted to cook but never had the time to. In lock down, you’ll have the leisure to let things simmer, soak, and rise.” Seared, braised and smothered with caramelized mushrooms, I gave myself into the process while the kitchen bloomed with delicious aromas and I delivered a different type of summer comfort food.

Braised Brisket with Caramelized Mushrooms

Serves 8

Ingredients: 

  • Extra virgin olive oil
  • 1 (5-pound) beef brisket
  • Kosher salt & freshly ground black pepper
  • 2 pounds cremini mushrooms, stemmed and
    finely sliced
  • 2 large onions, chopped
  • 3 celery ribs, chopped
  • 4 cloves garlic, smashed and chopped
  • 1 heaping tablespoon of tomato paste
  • 1/2 cup dry white wine
  • 1 15-ounce can of diced tomatoes with juices
  • 3 to 4 cups chicken stock
  • 2 bay leaves
  • 5 sprigs of fresh thyme
  • 1 sprig of fresh rosemary
  • 1 tablespoon of fresh lemon juice or Balsamic vinegar
  • chopped parsley for garnish

Method: 
Heat a large heavy-bottomed skillet or Dutch oven over high heat until warm, then add enough olive oil to coat the bottom of the pan (about 1 tablespoon.) When the oil has heated, add the brisket to the pan and season generously with salt and freshly ground pepper. Sear the brisket until it is completely browned, and then flip over to the other side, seasoning that side with salt and pepper. Brown the opposite side and remove from the pan, setting aside on a plate.

Add the mushrooms to the pan and allow them to brown before stirring them. Once they have seared to a lovely, light golden brown, give them a stir and allow them to cook until all of their liquid has been released and are a deep golden brown. Season with salt and pepper and remove them from the pan, setting aside on another plate. 

Add a little more olive oil to the pan,  and then add the onions, celery and garlic, season with a pinch of salt and pepper, and stir frequently until the vegetables have softened. Add the tomato paste and wine, stirring to incorporate everything, and cook for a few minutes until the mixture becomes thick and glossy. Add the tomatoes with their juices and stir to combine, cooking for a few minutes. Add the chicken stock, bay leaves, thyme and rosemary sprigs, and put the brisket back into the pan, nestled into the vegetable and broth mixture. Bring the mixture to a boil, then reduce to a simmer, cover the pan with a lid opened to a small crack, and cook for an hour over low heat. After an hour, flip the brisket over and check liquid level, adding more chicken stock if necessary, and cook for another hour and a half. 

After two and a half hours of cooking time, check the brisket to see if it is fork tender by gently pulling at the corner of the meat. If the brisket is still tough, return back to the braising liquid and cook it for another 30 minutes. If it is tender, place it on a cutting board covered with aluminum foil to rest for 20 minutes.

While the brisket rests, strain the braising liquid in a fine meshed strainer, discarding the vegetables and herbs. Return the liquid back to the pan and bring to a boil, cooking for about 10 minutes to make the sauce thick and flavorful. Add the lemon juice or vinegar and taste the sauce for seasoning. Adjust the flavor with more salt, pepper and lemon juice or vinegar if needed. Stir the mushrooms into the sauce.

Slice the brisket thinly across the grain and top with mushrooms, sauce and fresh parsley to serve.

Roasted Tomatillo and Avocado Salsa

Here’s another family favorite; a creamy, bright, zesty salsa that pairs perfectly with what’s on the summer grill, or just chips! We like to pile it on tacos or grain bowls, or drape it over grilled zucchini or chicken thighs. I love how the avocado keeps it’s pretty green color when it’s blended with the limey tomatillos. So quick and effortless, you’ll only need a sheet pan and blender, food processor or bullet to bring it all together.

Roasted Tomatillo & Avocado Salsa

Ingredients:

1 pound of tomatillos, papery skins removed, rinsed and cut into quarters

1 large onion, skin removed, cut into quarters

4 cloves of garlic

1 jalapeno, (remove seeds if you’d like the salsa mild)

Avocado oil, salt and ground black pepper

1 ripe avocado

1 bunch of fresh cilantro, stems removed

1 to 2 limes

Heat the oven to 400 degrees. Pile the tomatillos, onions, garlic cloves, and jalapeno on a baking sheet, drizzle generously with avocado oil, salt and freshly ground pepper. Place the baking sheet into the heated oven and roast the vegetables until they are charred and soft, about 20 minutes, turning with a spatula about half way through.

Remove the baking sheet from the oven and cool for a few minutes, the place the roasted vegetables in the bowl of a food processor, blender or bullet. Scoop the avocado from the skin and add it to the vegetable mixture, as well as the cilantro and the juice of one lime. Process the mixture until smooth, then taste for seasoning. Add more lime, salt or pepper if you like. You can serve this salsa right away or store in the fridge for up to 3 days.

Did you make this recipe? Tag your photo #familyfarmbox

Roasted Salmon with Fennel, Lemon & Caper Relish

Salmon is on the weekly rotation at our family table for good reason: it’s a healthy lean protein, packed with omega fatty acids, quick to whip up, and endlessly versatile. We all love it, but have our own favorite way to eat it. My daughter loves it plainly roasted, I like to pile on veggies to give it more flair, and my husband douses it with lots of lemon. A trick that I’ve learned to make everyone happy, but not make separate meals for everyone, is to create a delicious sauce that can be served on the side. My daughter will gobble it up, and sometimes be a little adventurous trying a bit of the topping, while my husband and I can feel like our gourmet sensibilities are satisfied. Here are some of my favorite spring flavors that come together in a quick saute to dress up roasted salmon, or even grilled chicken or pork.

Roasted Salmon with Fennel, Lemon & Caper Relish and Herb Quinoa

Serves 4

Ingredients:

1 fennel bulb, stems and fronds removed (save for stock) and the bulb diced

1 shallot, chopped

1 garlic clove, grated

1/4 cup of white wine

1 tablespoon of capers

zest and juice of one lemon

2 tablespoons of chopped parsley

Olive oil, salt & pepper

4 6-ounce salmon filets (I used wild steelhead salmon)

Method:

Heat the oven to 350 degrees F. Line a baking sheet with parchment paper and place the salmon filets on the paper. Drizzle with olive oil, salt & pepper and set aside.

Heat a skillet over medium-high heat and drizzle with olive oil to coat the bottom of the pan. Add the shallots and fennel, season with a few pinches of salt and pepper, and cook until the vegetables soften and brown slightly, about 3 minutes. Add the garlic and stir for about a minute, making sure the garlic browns but doesn’t burn. Add the wine and stir, then allow the wine to reduce by half, until syrupy. This will take about 3 minutes. Next, add the capers, lemon juice and parsley, giving one final stir. Turn off the heat and taste the relish for seasoning, it should be lemony with a slight licorice taste. Add more lemon, salt and pepper if you need it.

Put the salmon filets in the heated oven and roast for about 10-12 minutes. Remove them from the oven when the salmon is pink and firm. Top the salmon with the fennel mixture, drizzle with a little more olive oil if desired, and serve.

Herb Quinoa

This super-simple side dish is another staple at our family table. Usually I double up on it so I can make quick grain bowls through the week. Two keys to terrific quinoa are thoroughly rinsing the quinoa with cold water in a mesh strainer to rinse off the bitter coating, saponin, that’s on the outside. I think quinoa gets a bad rap because people have cooked it without taking this step! The next must-do is to toast it up in olive oil with either chopped onions (green ones are great too!), shallots or garlic before you put cooking liquid in. Water or stock is your choice, and in this recipe, any herbs you choose are fair game.

Herb Quinoa

Serves 4

Ingredients:

Olive oil

1 chopped shallot (or 3 green onions or a quarter of one onion, chopped)

2 garlic cloves, minced

1 cup rinsed and drained quinoa (the multi-colored quinoa makes a beautiful presentation!)

2 cups water (or stock, whatever you prefer)

salt & pepper

1/2 cup of chopped fresh herbs, such as basil, parsley, cilantro, dill, thyme, chives

Method:

Heat a large skillet over medium-high heat and drizzle with olive oil, enough to coat the bottom of the pan. Add the shallots, garlic and quinoa, stirring frequently to combine and toast, and cook for about 1 minute. Add a generous pinch of salt and stir everything together. Cover the pan with a lid and heat to a boil and then reduce to a simmer, and cook until the liquid is absorbed, about 12-15 minutes. When the quinoa is finished, the the germ ring will show around the outside of the grain.

Let the quinoa rest for about 5 minutes and then fluff with a fork. Fold in the herbs, season with a bit more salt and pepper, then taste for additional seasoning. Serve right away or cool and store in the fridge for 3 days or freezer for 3 months.

Did you make this recipe? Tag your photo #familyfarmbox

Grilled Zucchini with Basil Pesto and Orzo Salad

@dannettemitchellphotography

In my farm box came tender new zucchini and a sweet little box of brightly colored heirloom cherry tomatoes. Discovering a dreamy bundle of basil, I decided to combine two of my favorites: grilled zucchini with basil pesto and and a riff on orzo salad. Mediterranean orzo salad is a staple in my house, we make so many versions of it, sometimes adding roasted peppers, grilled eggplant, lots of lemon and zest, great olive oil, kalamata olives, thyme, pine nuts, Parmesan cheese; whatever is in the fridge that can tie it all together. My lovely spring zucchini with an herby, nutty pesto topped with one of our favorite salads is a perfect vegetarian main or side dish.

Let me know how you enjoyed this recipe, how it turned out for you and any changes you made! Please be sure to find me on Instagram to see more recipes and stories!! Or find me on Facebook Live for Kids Cook Along Classes.

@danettemitchellphotography

Grilled Zucchini with Basil Pesto and Orzo Salad

Ingredients:

1 bunch of basil leaves

1/4 cup of nuts (pine nuts, pistachios, almonds, walnuts all do well here!)

1-2 garlic cloves

2-3 tablespoons of good quality olive oil, plus more for zucchini

4 whole zucchini, stems and bottoms trimmed, cut in half lengthwise

1 pint of cherry tomatoes, cut into halves

1 cup of cooked orzo (just follow package instructions, rinse and drain, then coat with a light drizzle of olive to keep from sticking)

1 lemon, zested, then juiced

1/2 cup crumbled feta cheese

Freshly ground pepper & sea or kosher salt

Method:

In a small food processor or blender, combine the basil, nuts, garlic and olive oil, and blend until combined but still a little chunky. It should look like a paste, if it’s too dense, add a little more olive oil, and process more. Taste for seasoning and add pepper and salt as needed. Remember, we are adding in feta cheese at the finish, so don’t make it too salty.

Heat a grill or grill pan to medium high heat. Drizzle the zucchini with olive oil to coat, and season with pepper and salt. When grill is hot, place the zucchini on with tongs. Grill until grill marks form and zucchini is slightly softened, then flip and grill until marks show on the other side. Remove from grill and arrange on a platter. Drizzle the pesto over the grilled zucchini.

Mix together the orzo, cherry tomatoes, lemon zest and juice, and feta cheese with a drizzle of olive oil. Season to taste with freshly ground pepper and salt, then dish out over the grilled zucchini to serve.

Did you make this recipe? Tag your photo #familyfarmbox

Spring Vegetable and Chick Pea Curry Bowls

I’m looking back on a happy memory as we start our fourth week of quarantine, when my dear friend Danette came to my home to shoot some dishes. Collaborating, seeing her point of view with her excellent eye, laughing and tasting food together was such an enriching and warm way to spend an afternoon. She made the food look so inviting with her take on lighting and had so many fun styling suggestions. Remembering spending a creative day with a friend is a comfort to me, as we are all under safe at home orders in California.

But we can cook! My family and I have already created so many memories in the kitchen, from baking scones, bear claws and cookies with my daughter, to making traditional Brazilian food with my husband. I have started teaching kids cook-along lessons online, and taking lots of photos of the food I’m making (although not as lovely as Danette’s) so I can share what we are making with friends and family. These moments are priceless and important, and although I miss my community, I’m growing new skills and thriving with the love of my family.

I’m making a list of all the things I’d like to do once we all are healthy and safe again, and number one includes seeing my friends. Until then, if you’d like to see some gorgeous portraiture and meet a photographer with a talent for light and whimsy, check out Danette Mitchell Photography. And here’s a dish full of spring flavors and beautiful colors that taste as good she made them look.

Spring Vegetable & Chickpea Curry Bowls

Serves 4

Ingredients:

Extra virgin olive oil

1 can (14 ounce) chickpeas, drained

Kosher or sea salt and  freshly ground pepper

2 zucchini, or summer squash, sliced

2 ears sweet corn, kernels removed from the cob

1 shallot, chopped

1 inch fresh ginger, minced or grated

2 cloves garlic, minced or grated

1 1/2 tablespoons yellow curry powder

1 14-ounce can of coconut cream

Zest and juice of one lemon (zest first, juice after J)

1/4 cup fresh cilantro or basil, roughly chopped

2 cups cooked jasmine, basmati or brown rice

Sesame seeds, green onions, and sliced Persian cucumbers, for serving (optional)

Method:

Heat enough olive oil to coat the bottom of a large sauté pan over medium heat. When the oil shimmers, add the chickpeas and season with salt and pepper. Cook, stirring occasionally until the chickpeas begin to crisp, about 5 minutes. Carefully remove 1/2 cup of chickpeas and reserve for topping, if you’d like them as a garnish. Otherwise, just leave them in. 

To the remaining chickpeas, add the zucchini, corn, shallot, garlic, and ginger. Season with salt and pepper. Cook the veggies another 5-10 minutes or until they just begin to soften.

Stir in the curry powder and cook until fragrant, about 1 minute. Add the coconut milk and stir to combine, bringing the mixture to a simmer over medium heat. Cook 5-10 minutes or until the sauce thickens slightly. If the sauce thickens too much, add a little water to thin. Remove from the heat and stir in the lemon zest and juice, and cilantro. Taste the curry for seasoning and adjust with more salt, pepper or lemon juice if needed.

To serve, divide the rice among bowls and spoon the curry over. Top with the reserved chickpeas, green onions, sesame seeds and cucumbers.

Did you make this recipe? Tag your photo #familyfarmbox